
Designing an Exportable 3D Shed Model for a First DIY Build

Ilya Tkachov
Updated
A homeowner in Santa Cruz, California, had spent about a year thinking through a detached backyard office, study, and personal space. He had an engineer’s confidence that he could learn the work, but this would be his first major building project. The volume of decisions had kept the idea in the planning stage.
The project mattered for another reason: he wanted to build it with his nearly eight-year-old son. The right design therefore had to do more than look good. It needed to fit the customer’s understanding of the local permit-exemption limits, be straightforward enough for a first family build, provide enough information to estimate cost, and remain portable enough to use outside HomeCat—including inside a model of the customer’s own backyard.
“I’ve always wanted to be the kind of person that can just decide to build something semi-permanent, and then ‘just do it.’ […] I also have a little boy who’s almost eight. I think it would be amazing to work with him on something like this.”
The first major build carried a year of uncertainty
The customer did not arrive with a blank page. He had been studying shed plans, browsing other people’s builds, and testing ideas for a long time. A five-corner kit with a more elaborate roof had become the main visual reference. He liked its character but wanted more light high in the building, possibly through several dormer windows.
That amount of research can create a trap for a first-time builder. Every attractive detail introduces another junction to frame, flash, waterproof, price, and explain. A design can become more ambitious while the route to construction becomes less clear. HomeCat’s first task was therefore not to reproduce every inspiration literally. It was to identify which parts served the project and which parts increased risk without solving the core need.
The customer was open about that tension: the confidence to build was real, but so was the feeling of being overwhelmed. A full-scale model gave the conversation something concrete to react to instead of adding another collection of disconnected ideas.
The stated local exemption defined a 10×12×10-foot envelope
Based on the customer’s reading of Santa Cruz County requirements, the shed needed to remain at or below 120 square feet to avoid a more involved permit process. He also understood the maximum height to be 10 feet when measured from the original or graded ground, and that the foundation could not behave like a permanent monolithic slab.
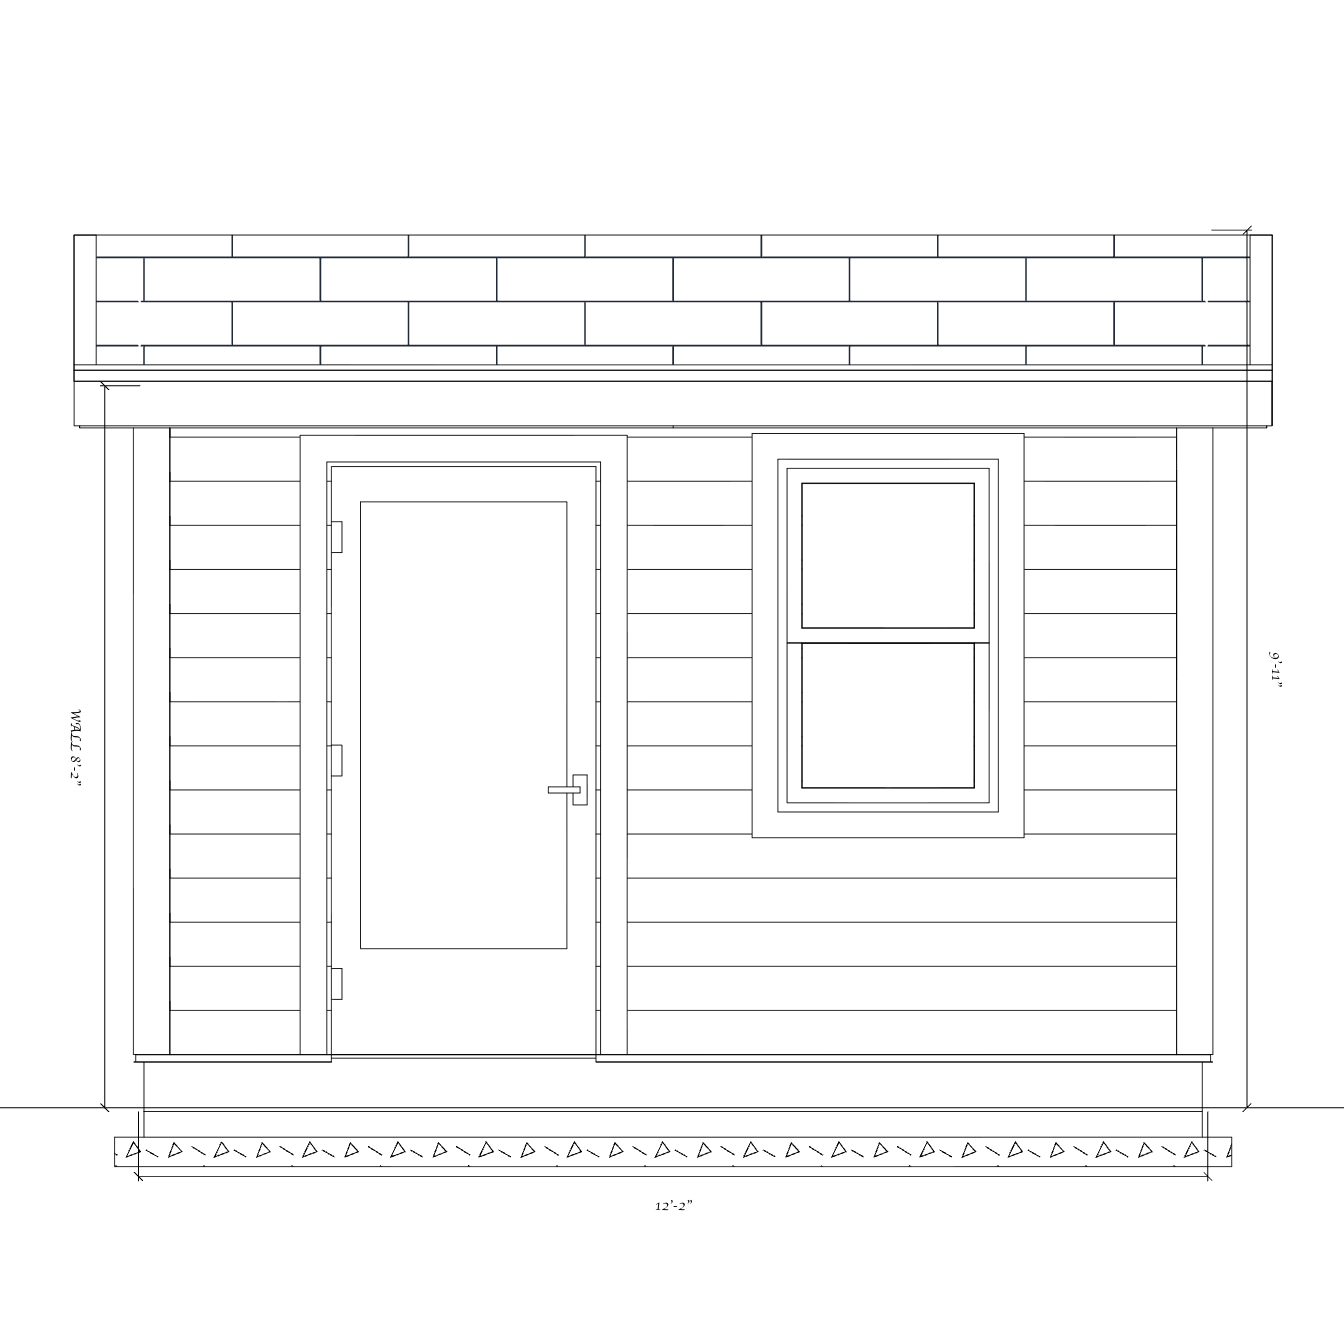
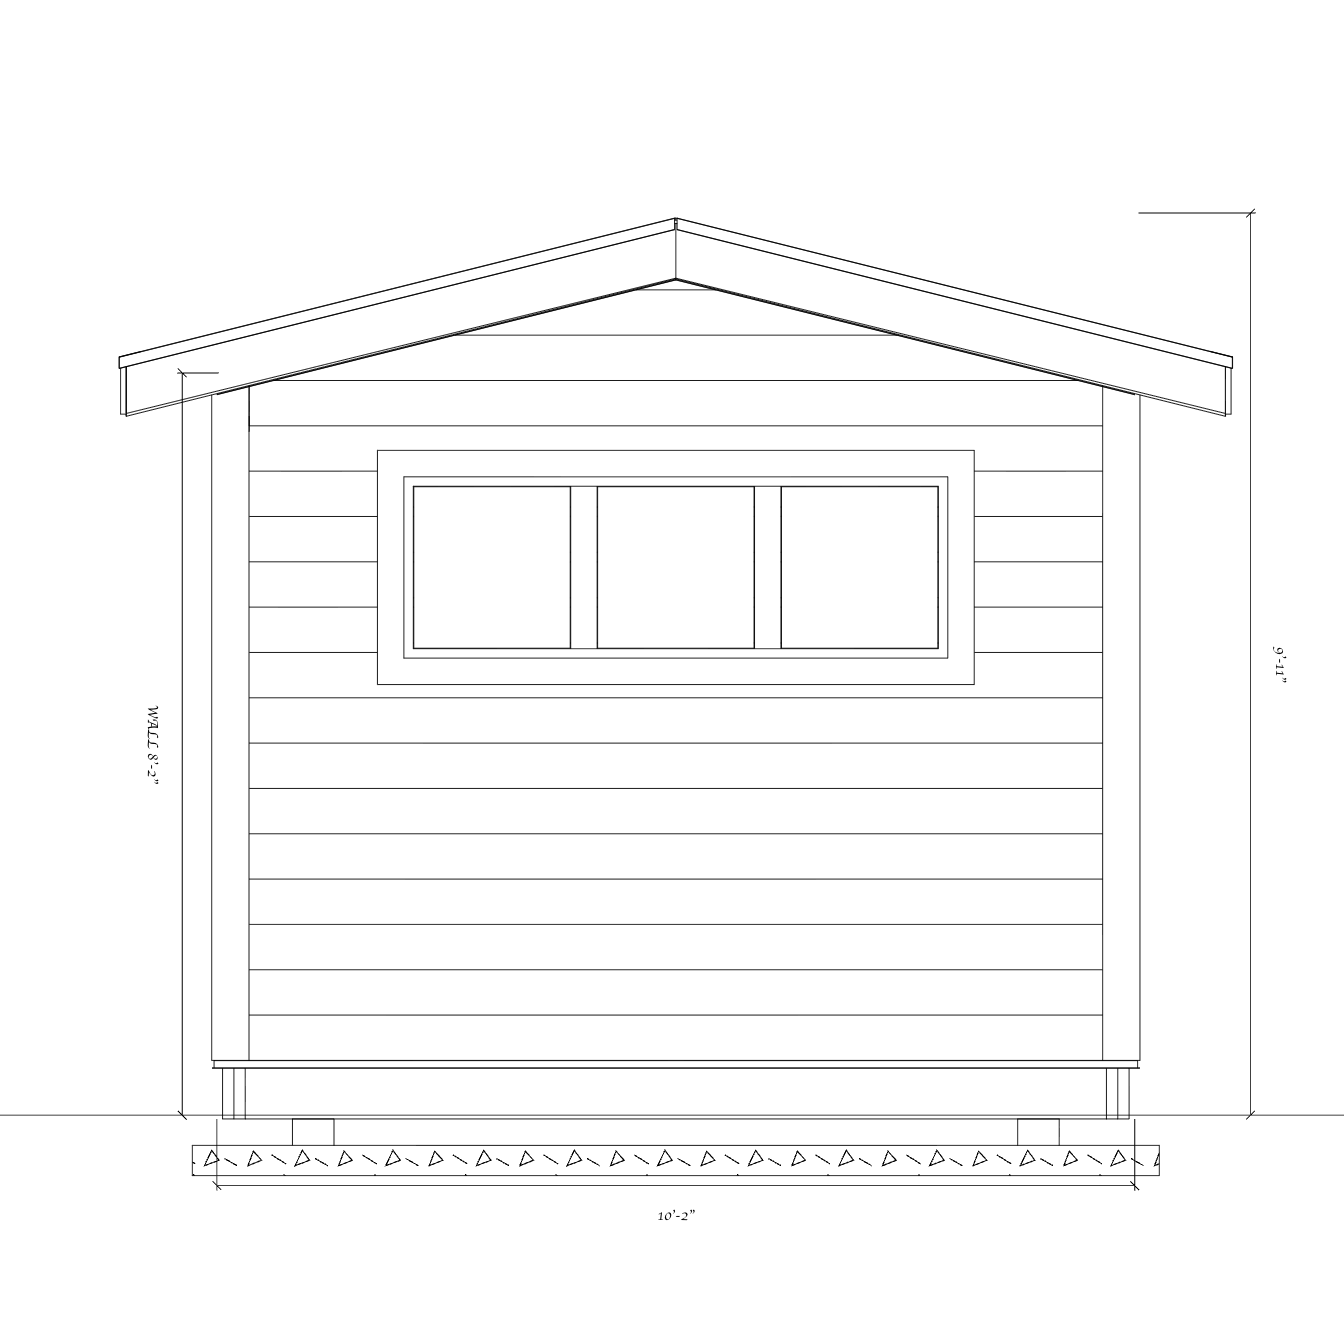
HomeCat used the entire 120-square-foot allowance with a nominal 10-by-12-foot rectangle and kept the modeled high point at approximately 10 feet. The model placed the base slightly into the grade to protect that height target while retaining useful wall height and a steeper gable roof. That relationship was visible in the elevations rather than being left as a vague note.
Permit exemptions and measurement rules depend on the exact site, use, utilities, setbacks, and current local language. The customer’s understanding established the design brief, but a homeowner should still confirm the final project with the local authority before building.
Simplifying the shed was progress—not compromise
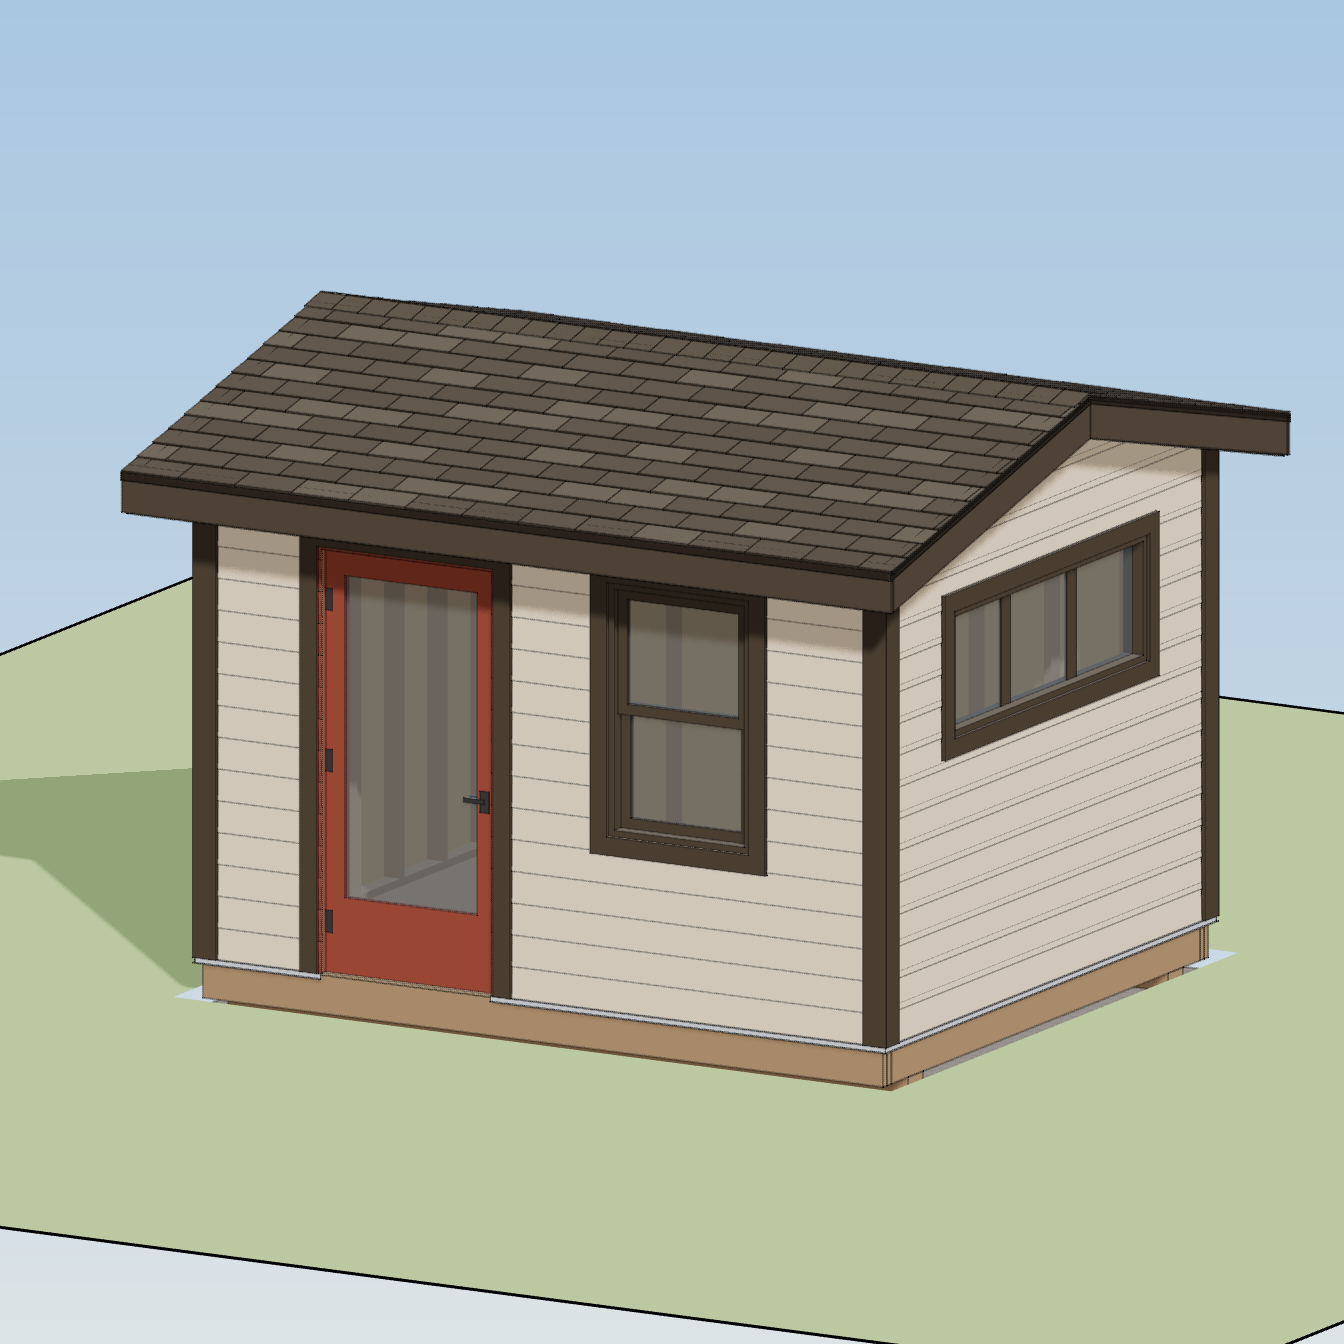
The five-corner reference and multiple dormers were replaced with a simple rectangle and a conventional gable roof. That decision reduced the number of roof planes, valleys, wall angles, and special cuts a first-time builder would have to execute. It also made the framing sequence easier to see in drawings and easier to explain to a child helping with the project.
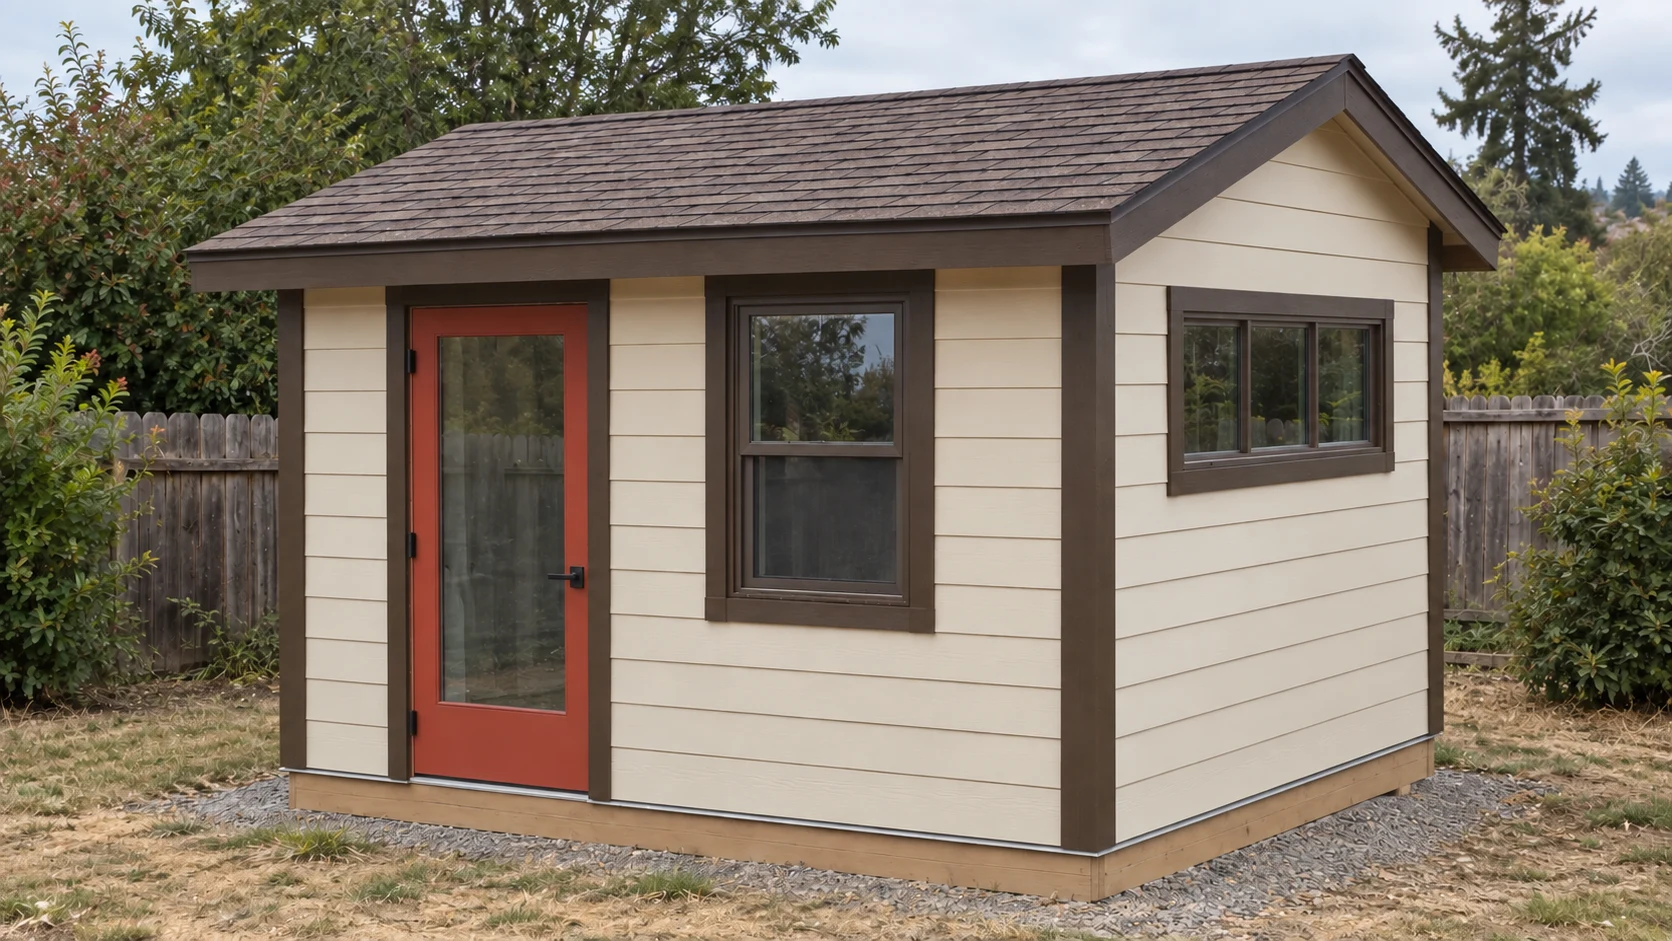
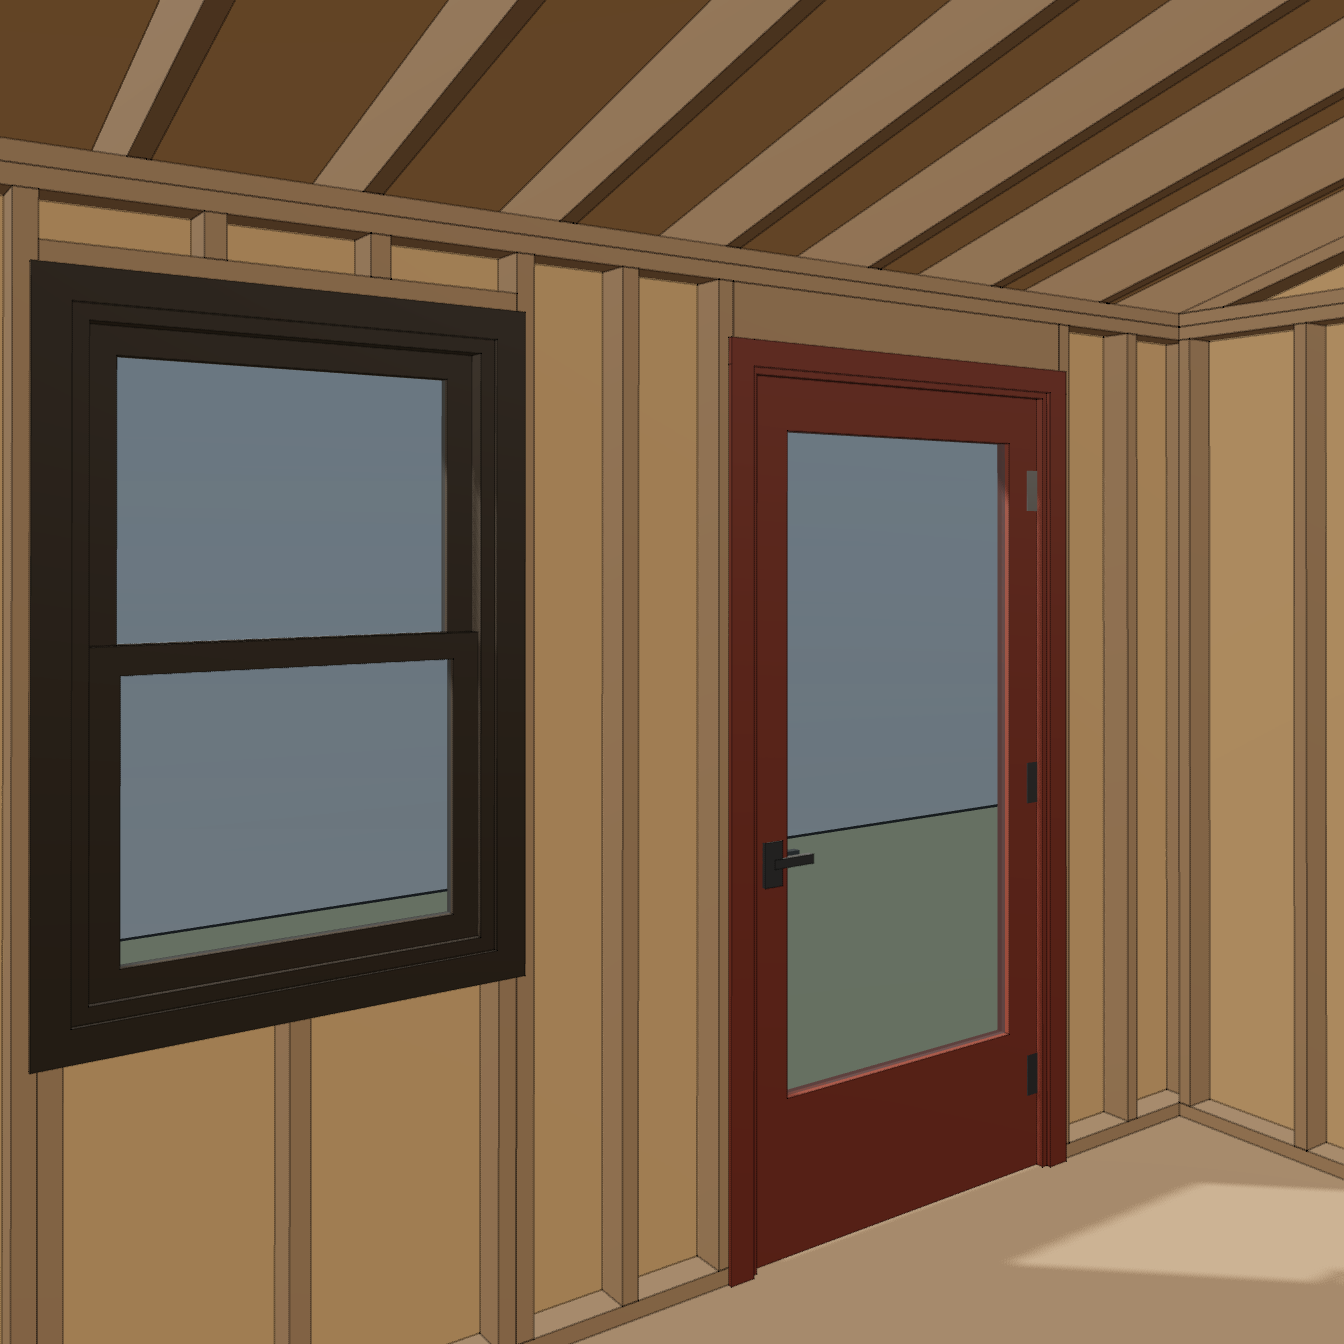
The daylight goal was preserved in a different way. Instead of piercing the roof with dormers that competed with the 10-foot height target, HomeCat placed a wide horizontal window high on the gable-end wall. A conventional window and glazed red door brought additional light through the long wall. The result still had visual character while keeping the roof as one familiar, repeatable assembly.
Cream lap siding, dark trim, brown shingles, and the red door also gave the small office a residential quality that could relate to the customer’s 1940s ranch-style house. Matching the home did not require copying it exactly; using a familiar roof form, siding scale, and modest openings was enough to make the shed feel connected to its setting.
The foundation idea had to be buildable and removable
The customer initially considered nine metal ground sockets and a galvanized pipe platform. The appeal was understandable: individual components seemed more removable than a concrete slab and appeared compatible with the customer’s reading of the exemption. The unresolved questions were cost, installation effort, leveling, corrosion exposure, and how the metal platform would connect cleanly to a conventional wood building.
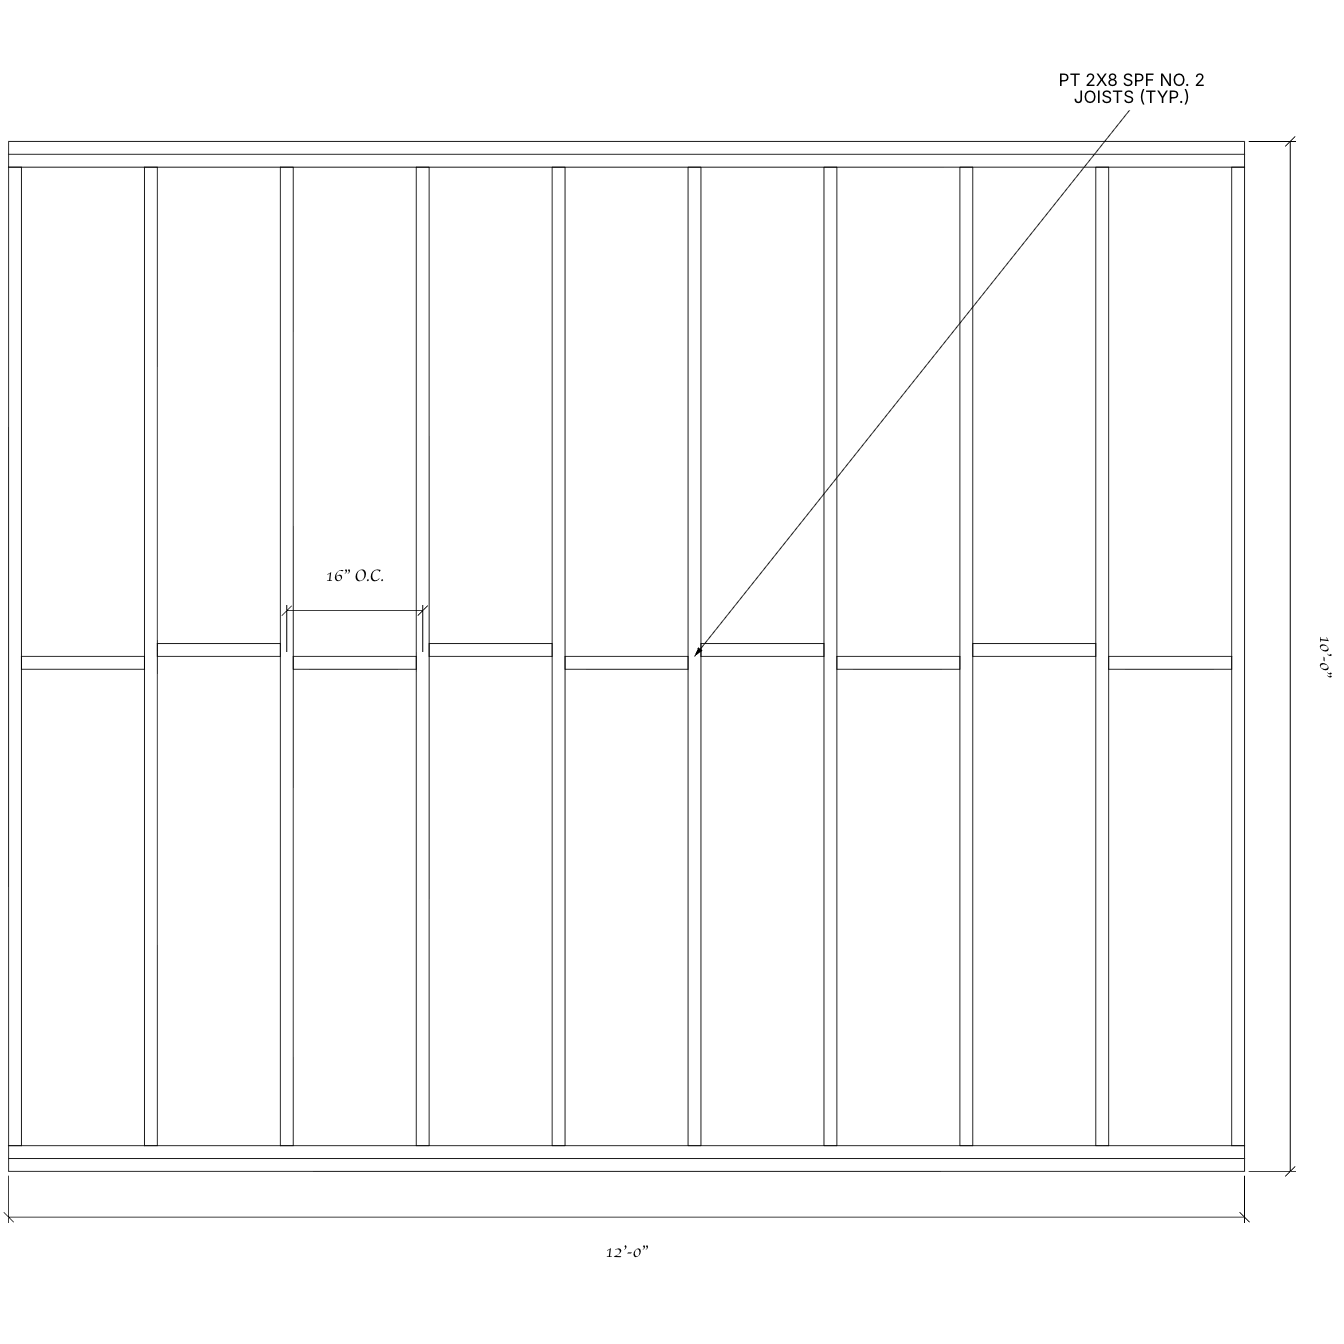
HomeCat recommended a wood floor and joist system instead. For this project, familiar lumber framing would be cheaper and easier to assemble, adjust, insulate, and explain than a custom galvanized substructure. It also aligned with the goal of making the first major project approachable rather than turning the foundation into its own engineering experiment.
That recommendation was a design-direction decision, not a site-specific foundation approval. The final support layout still depends on soil, drainage, wind and seismic requirements, anchorage, and the county’s exact definition of a non-permanent foundation.
Materials and sequencing mattered more than colour
When asked what would make the design genuinely useful, the customer ranked a material list first. It would determine whether the project fit the family budget. Guidance on the ground socket idea came next, followed by step-by-step construction instructions. The colours in the model were helpful, but they were not what would move the project forward.
HomeCat produced an early cost estimate of roughly $4,000 USD for the modeled design. The estimate was explicitly rough. A dependable purchasing package would require current products and prices from a store near the customer, plus a settled foundation, opening schedule, and material specification. HomeCat offered to develop that local shopping list, refine the cost, provide construction steps, and continue revising the design as a separate next phase.
“Material list is most important to me. I think that would help estimate the cost. […] Steps on how to build would be HUGE.”
The model had to leave the browser
HomeCat delivered the first design as a browser-based 3D walkthrough with basic building plans. The customer liked the result, then asked the question that made this project different: would the paid handoff include source files that could be used outside HomeCat?
His goal was to place the shed inside an existing model of his backyard. He was not asking for another polished image; he wanted portable geometry. He suggested STL because it is widely supported, while acknowledging that a mesh format could create more editing work later.
“I want to open it and put it in a model of my backyard. […] Whatever format is most portable, that’s what I’m looking for.”
HomeCat’s project geometry is stored in a BIM-like format and can be exported for downstream tools. That makes a SketchUp workflow possible without treating a screenshot as the final handoff. The best exchange format depends on the goal: STL is broadly portable but reduces the building to mesh geometry, while a more structured format can preserve cleaner surfaces and make continued editing easier. The important point is that the customer would not be locked into viewing the design only inside one website.
HomeCat also offered a more direct site-context workflow. The customer could record a phone video while circling the proposed area—or the entire property—and HomeCat could reconstruct the backyard and place the shed in its intended location. That would answer the underlying question behind the export request: how would this exact 10×12 building sit beside the house, landscaping, and property boundaries?
The conversation established the available export and property-reconstruction workflow; it does not record a final source-file export or backyard scan being completed. Keeping that distinction clear makes the case study more useful: the portable model was the next handoff the customer was defining, not a file silently assumed to have been delivered.
What the customer received
The design turned a year of ideas into a specific small building that the customer could inspect, price at a high level, and use to plan the next phase. The delivered project included:
- a full-scale 10×12 shed model kept at approximately 10 feet overall;
- a browser-based 3D walkthrough;
- a simple gable form selected for a first DIY build;
- a high side window that added daylight without roof dormers;
- exterior and exposed-framing interior views;
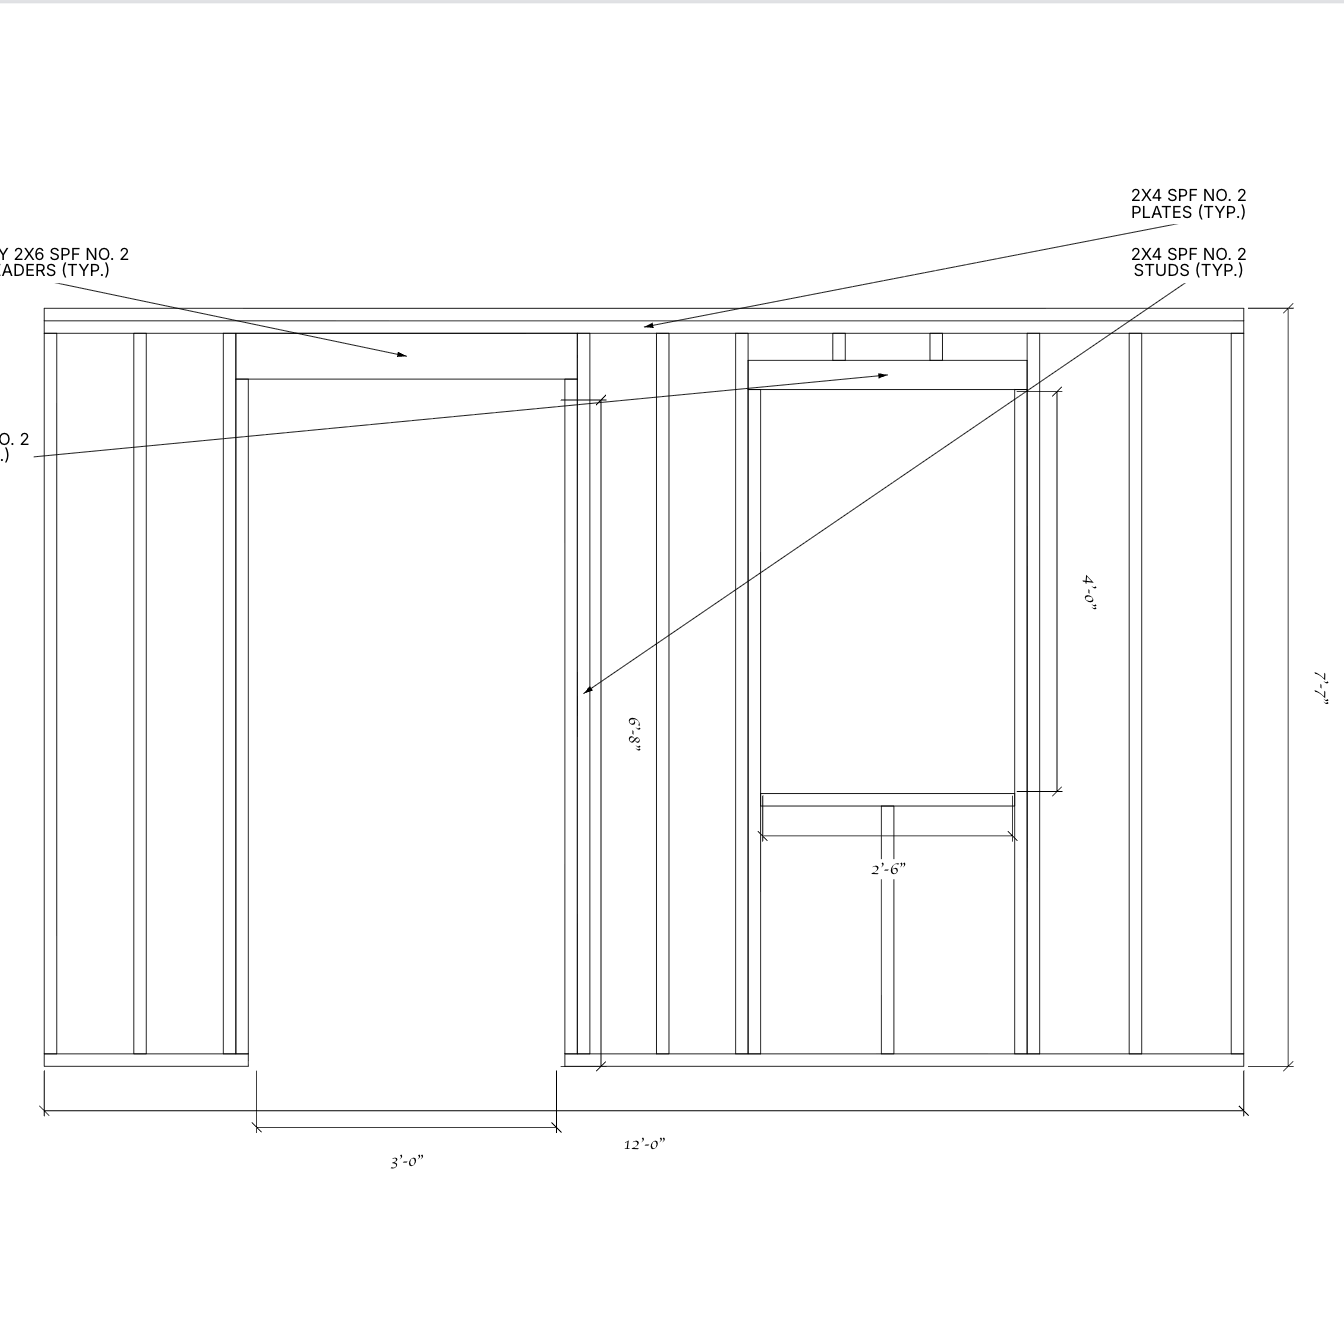
- dimensioned front and side elevations;
- wall- and roof-framing drawings for review; and
- a rough early cost estimate of approximately $4,000 USD.
The portable source-file export, store-specific shopping list, detailed build sequence, and reconstructed backyard placement were identified as the next layer rather than presented as completed deliverables. That still changed the nature of the project. The customer was no longer choosing between a closed rendering and rebuilding everything manually; the same model could become the source for plans, estimates, revisions, external modeling, and site context.