
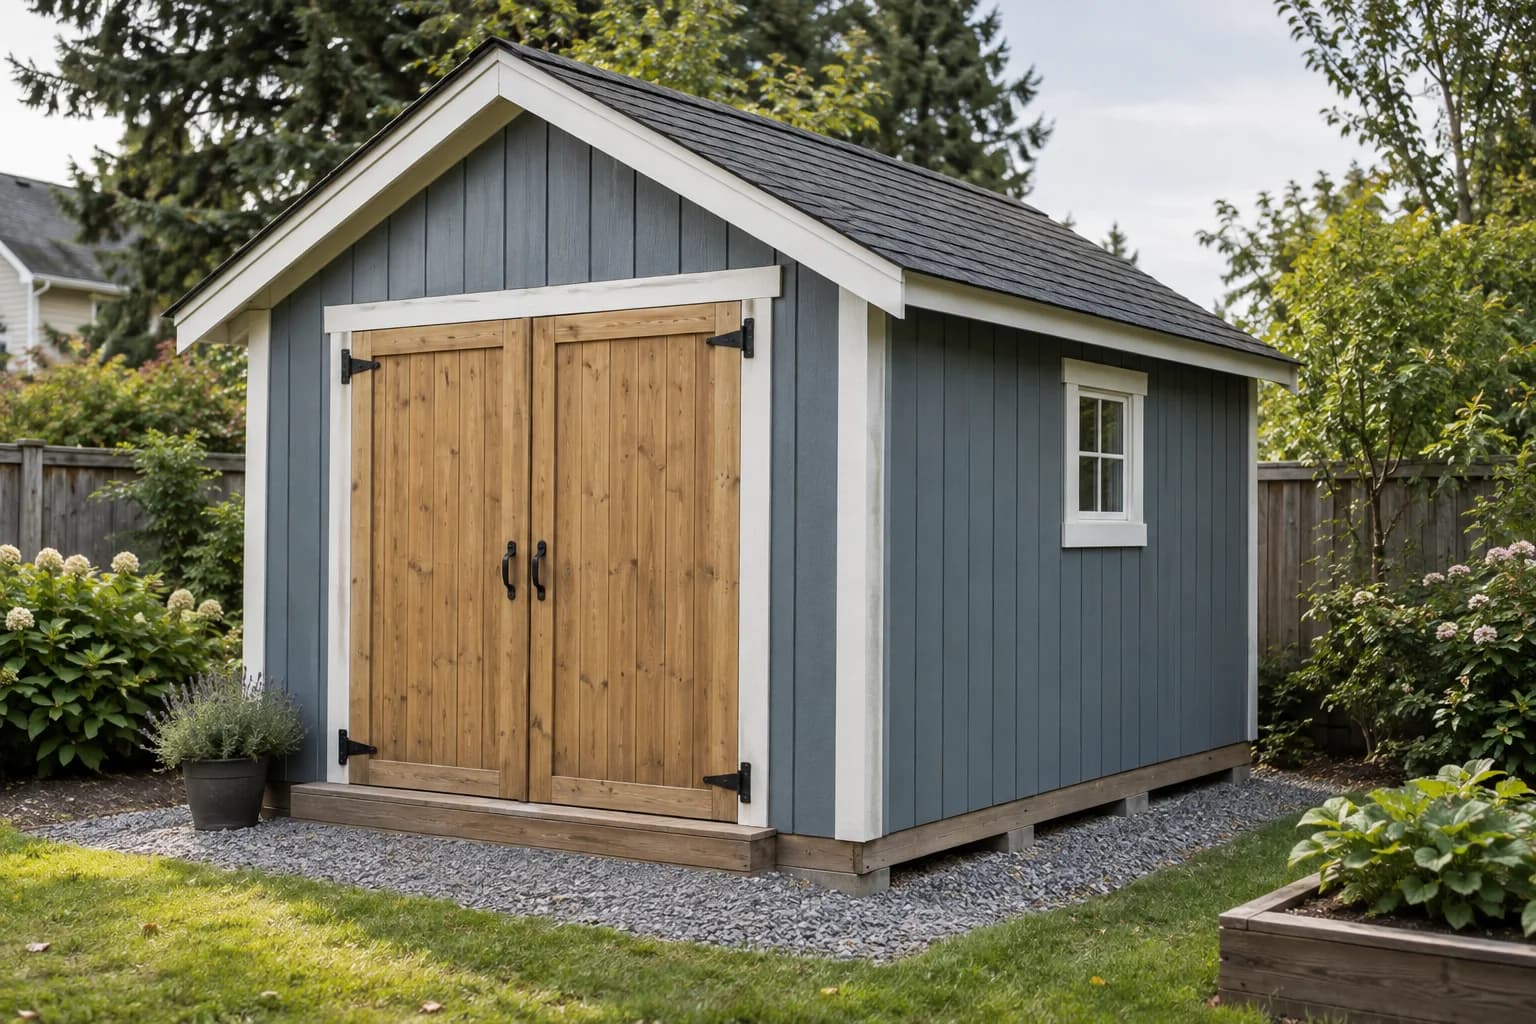
Ten by twelve feet is a useful middle ground: large enough for a mower, bicycles, garden equipment, and shallow shelving, but still compact enough for many urban yards. The rectangular plan also uses standard sheet goods efficiently: four 4×8 plywood sheets cover the 120-square-foot floor when the final narrow row is planned around reusable cutoffs.
This article is a planning and construction reference, not a sealed structural or permit drawing. Local frost, snow, wind, soil, and zoning requirements can change the foundation, headers, rafters, connectors, fasteners, and allowable placement.
Even where 120 square feet is permit-exempt, setbacks, utilities, easements, maximum height, lot coverage, grading, and anchorage can still apply. Ask the local authority and utility-locating service before excavation.
The design
Small enough to be efficient, wide enough to use
Centering a five-foot pair of doors on the 10-foot gable gives each side enough solid wall for bracing and a narrow storage run. A 24-by-36-inch window on the east or north wall admits working light without taking the best wall for rakes and shelves. Three longitudinal skids shorten the effective floor-joist span and keep the wood platform above the gravel.
Before you build
Plan the order before buying lumber
These quantities are a budgeting takeoff for the reference layout, with a modest waste allowance. Reconcile the list with approved spans, your actual window and door rough openings, siding exposure, roof overhangs, and supplier stock lengths.
| Assembly | Main material | Planning quantity |
|---|---|---|
| Base | 4×4×12′ pressure-treated skids | 3 |
| Floor | 2×6 pressure-treated joists and bands | 13 pieces total |
| Subfloor | 3/4″ tongue-and-groove exterior plywood | 4 sheets |
| Walls | 2×4 studs, plates, opening framing, and blocking | About 55 pieces |
| Roof | Locally approved rafters, ridge, ties, and connectors | 11 rafter pairs |
| Sheathing | Wall and roof structural panels | About 21 sheets |
| Roofing | Underlayment, drip edge, and asphalt shingles | About 2 squares |
| Exterior | Weather barrier, flashing, siding, vents, and trim | Allow 420 sq. ft. |
Simple tools, careful layout
- Circular or miter saw
- Drill and impact driver
- Framing and speed squares
- 4-foot level and string line
- Tape, chalk line, and clamps
- Hammer or framing nailer
- Stable ladders
- Eye, ear, and hand protection
Site work
Lay out a pad that drains
Stake a 12×14-foot work area so the finished stone projects roughly a foot beyond the building. Strip sod and dark organic soil; leaving roots below the pad invites settlement. Set level strings, establish where runoff can leave the site, and place compactable crushed stone in two thin lifts rather than one loose layer.
- Measure both diagonals of the 12×14 rectangle and make them equal.
- Keep the stone surface above nearby soil and the surrounding grade falling away.
- Compact the perimeter as carefully as the middle because the skids end nearby.
Foundation
Level three skids as one base
Lay three ground-contact pressure-treated skids in the 12-foot direction. Position the outer skids in from the floor-frame edges and center the third between them so the 10-foot joists have short, balanced spans. Use approved bearing pads where required and check across all three with a straight board and level.
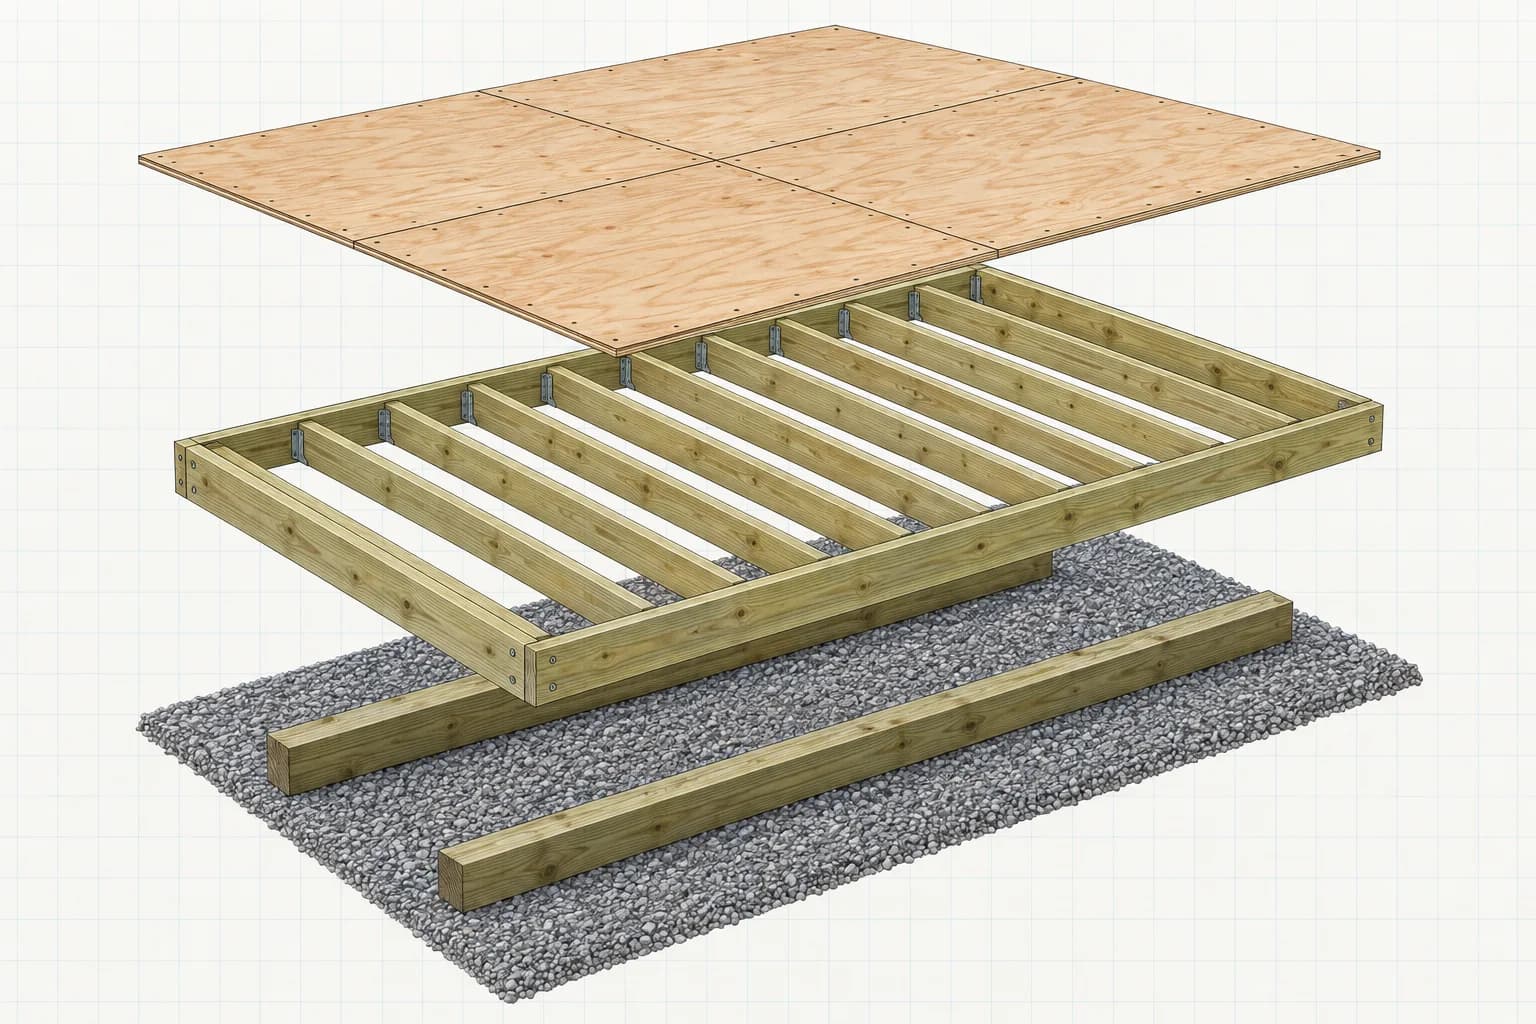
Anchoring is site-dependent. A movable skid shed may still need ground anchors and rated straps against wind, while some regions require frost-depth piers or a permanent foundation. Decide this detail before the floor covers access to the underside.
Floor platform
Frame exactly 10 by 12 feet
Assemble the pressure-treated 2×6 floor frame on the level skids. Run joists across the 10-foot width at 16 inches on center, with crowns upward and layout marks pulled from one common end. Before anchoring, compare corner-to-corner diagonals: a true 10×12 rectangle has diagonals of approximately 15 feet 7-7/16 inches.
Apply subfloor adhesive and install 3/4-inch tongue-and-groove plywood with face grain across the joists. Stagger unsupported end joints, preserve the panel maker’s edge gaps, and protect the exposed deck if wall framing will wait through rain.
- Support every square-cut panel edge.
- Recheck square after fastening the frame to its skids.
- Mark the planned door threshold before snapping wall lines.
Wall framing
Use each wall for storage
Frame the rectangular walls flat on the deck with 2×4 studs at 16 inches on center. The front gable wall needs king and jack studs around the five-foot door opening; size its header for the actual roof and local snow load. Follow the chosen window’s rough-opening instructions rather than treating its nominal size as the opening.
Raise the long walls first with helpers, brace each wall back to the floor, then add the gable walls. Fasten corners, plumb every plane, and lap the second top plate over the joints. Keep at least one full stud bay at the corners and beside the door for approved wall bracing.
Shallow 12-inch shelves on the opposite wall leave a clear central aisle. Deep shelving on both sides makes a compact shed frustrating to use.
Gable roof
Test the roof on the building
A 6:12 roof rises 2 feet 6 inches over the 5-foot half-span. That steepness sheds weather while keeping the ridge height modest. Cut one rafter pattern with the planned eave, ridge allowance, and shallow birdsmouth; test it against both wall plates before using it to mark the remaining rafters.
Support the ridge straight and set opposing rafter pairs at the approved spacing. Install ties or another engineered system to resist wall spread, plus rated uplift connectors at each bearing. Do not assume a rafter size from this article—species, grade, snow, wind, roof covering, and spacing govern the permitted span.
Weather shell
Roof first, then work down
Install roof sheathing across the rafters with staggered joints, specified gaps, and edge clips or blocking where required. Follow the roofing maker’s sequence for eave drip edge, underlayment, rake metal, starter strip, field shingles, and ridge cap. Keep an unobstructed ventilation route if the chosen assembly needs one.
Sheath and brace the walls, then apply the weather-resistive barrier from bottom to top so upper layers shed onto lower ones. Flash the window sill before setting the unit, integrate jamb and head flashing, and keep siding far enough above gravel to dry rather than wick moisture.
Doors + finish
Fit the opening to the equipment
Build or install the doors only after checking the finished clear opening against the widest machine that must pass through it. Hang each leaf on at least three heavy exterior hinges, brace site-built leaves against sag, and use head and foot bolts on the inactive door. A sloped, removable ramp should bear on firm ground without trapping water against the floor band.
Finish with corner boards, fascia and rake trim, screened gable vents, and coating on every exposed face and fresh cut. Place wall hooks into studs rather than siding, keep fuel and chemicals in approved storage, and preserve access to anchors and electrical disconnects.
Make it site-specific
Fit the shed to the way your yard works
Door swing, ramp direction, drainage, window orientation, exterior materials, and foundation details all depend on the property. HomeCat helps coordinate those choices with the site instead of leaving them as disconnected sketches.
Customize these shed plansCommon questions
Before you start
Is a 10×12 shed big enough for a riding mower?
It can be for many compact machines, but measure the mower with its deck, bagger, and mirrors in operating position. Check door clearance, ramp angle, turning space, and whether you can still reach stored items once it is parked.
Does a 10×12 shed need a permit?
The answer is local. Some areas exempt a 120-square-foot structure; others use a smaller limit or still regulate setbacks, height, lot coverage, drainage, anchorage, and electrical work even without a building permit.
Can I use two skids instead of three?
Only if the floor design, lumber spans, bearing, and anchorage support it. The reference uses three skids to shorten joist spans and make a compact platform feel solid under concentrated mower or shelving loads.
How long does the build take?
A prepared two-person crew may close in the shell in three to four working days. Site work, inspection timing, finishes, interior fit-out, and weather extend the overall schedule.