
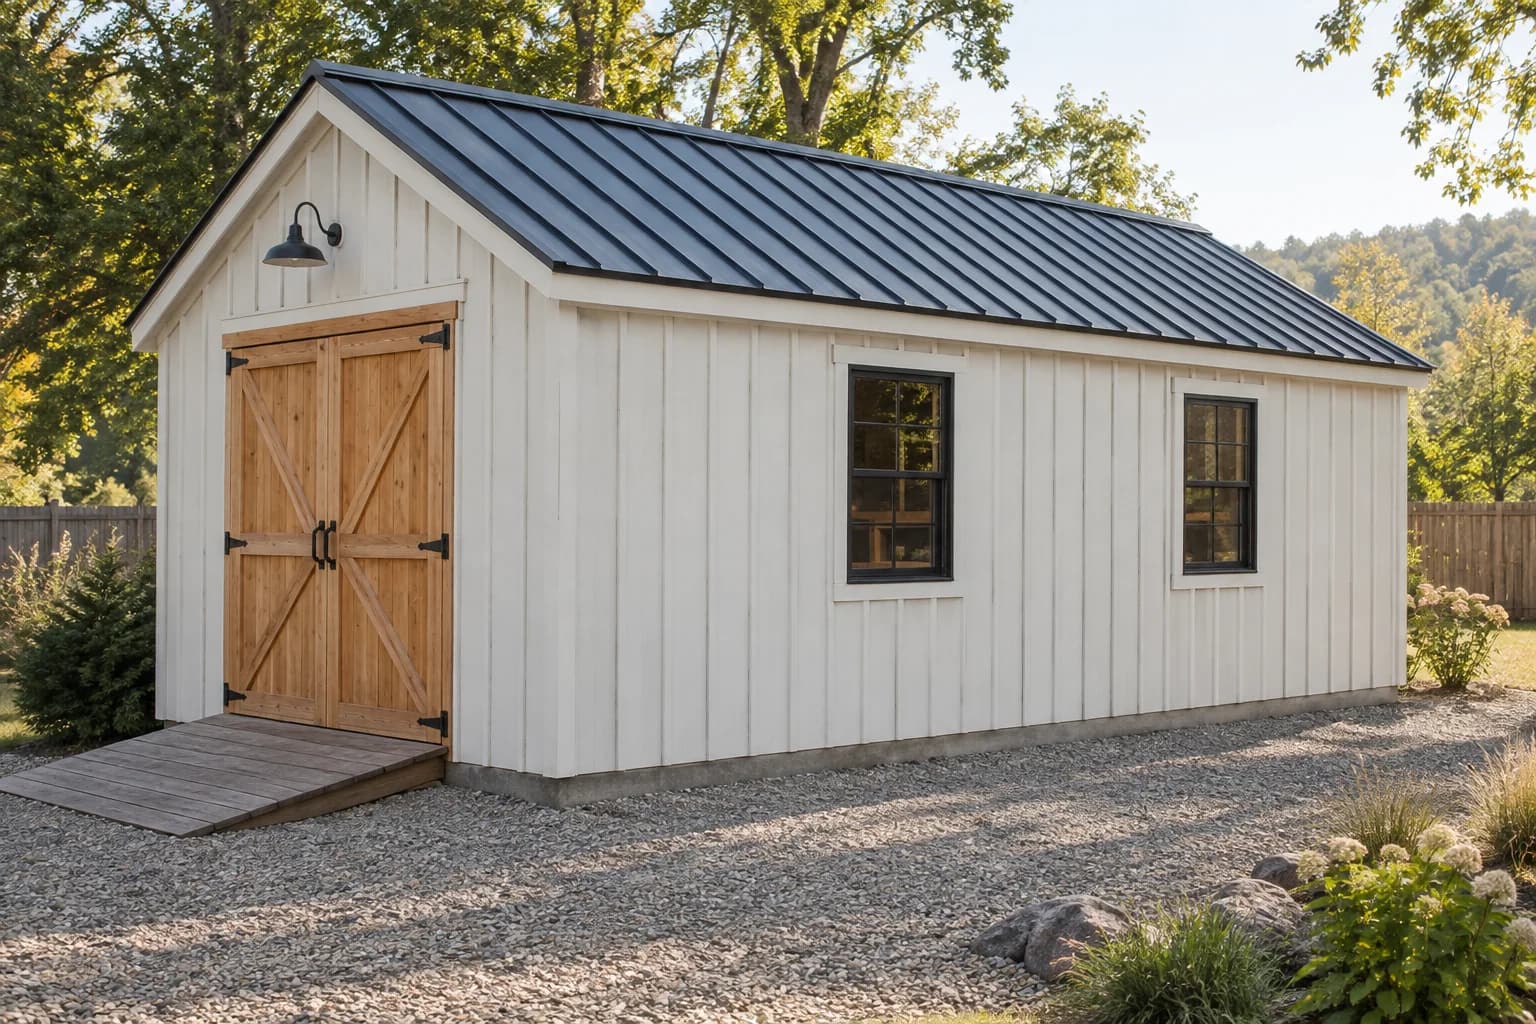
The extra four feet beyond a 12×16 shed changes more than capacity. It creates enough length to park equipment at the entry while keeping a real 8-foot workbench usable at the rear. It also changes construction logistics: 20-foot walls and skid lines are difficult to lift, deliver, and keep straight as single pieces.
The reference below deliberately breaks the long assemblies into manageable sections and treats their joints as design details. It is still a planning guide, not a sealed permit set. Have local requirements establish the foundation, spans, headers, bracing, connectors, anchorage, and fastening schedule.
Verify permits, setbacks, easements, lot coverage, maximum height, electrical rules, and property drainage. If it will be heated, occupied, or used for a business, additional zoning, energy, fire, or foundation requirements may apply.
The design
Divide the length without building a wall
The front 8 feet is an unobstructed landing zone for a mower, bicycles, lumber, or a rolling cart. The rear 12 feet carries the primary bench beneath two 3-by-4-foot windows. Keeping windows on one long wall leaves the other available for a shallow, continuous storage system and helps simplify wall bracing.
Before you build
Order around the long assemblies
Twenty-foot treated timbers and wall plates are not stocked everywhere and are awkward to transport. Confirm availability early. If a skid or plate must be spliced, put the joint over designed bearing or framing, stagger adjacent joints, and use an approved connection rather than simply butting short pieces together.
| Assembly | Main material | Planning quantity |
|---|---|---|
| Base | 4×6 treated skid lines, continuous or approved splices | 4 at 20′ |
| Floor | 2×6 pressure-treated joists, bands, seam blocking | About 20 pieces |
| Subfloor | 3/4″ tongue-and-groove exterior plywood | 8 sheets |
| Walls | 2×4 studs, plates, opening framing, and joint backing | About 85 pieces |
| Roof | Locally approved rafters or trusses, ties, and connectors | 17 rafter pairs |
| Sheathing | Wall and roof structural panels | About 32 sheets |
| Roofing | Underlayment, edge metal, and roofing finish | About 3.5 squares |
| Exterior | Weather barrier, flashing, siding, vents, and trim | Allow 650 sq. ft. |
Add lifting and straightening gear
- Circular and miter saws
- Drill and impact driver
- Framing square and story pole
- 6-foot level and string line
- Long tape, chalk line, and clamps
- Wall jacks or adequate crew
- Scaffold and fall protection
- Eye, ear, and hand protection
Site planning
Leave room to build the long sides
Mark at least a 14×22-foot gravel pad, then check that you also have working room beyond the long walls. Delivery, wall assembly, scaffold, and roof access all need space. Strip organic soil, route surface water away, place separation fabric when appropriate, and compact crushed stone in controlled lifts.
- Pull building lines independently from fences, which may not mark the boundary.
- Set the front elevation to suit the ramp without creating a drainage pocket.
- Plan conduit or sleeves before stone and skids cover the route.
Foundation
Create four straight bearing lines
Set four ground-contact pressure-treated skid lines parallel to the 20-foot walls. Level every bearing point, then use a tight string to remove crowns or dips along each line. Short floor-joist spans do not compensate for a twisted foundation; the walls and ridge will repeat every irregularity below them.
Where skids are spliced, place the joint over a designed pier, pad, or bearing block and use the specified side plates or straps. Stagger joints so they do not create a weak cross-line. Complete locally required earth anchors, helical piles, or other hold-downs while the underside is accessible.
Floor platform
Join floor sections over support
Two 10-foot-long floor sections are easier to assemble and square than one 20-foot ladder frame. Join them at a fully supported cross-line, with doubled framing or approved seam blocking, then install continuous outer bands or designed splice plates. Run 2×6 joists across the 12-foot width at 16 inches on center.
Check the completed 12×20 perimeter before decking. Its exact corner-to-corner diagonal is approximately 23 feet 3-7/8 inches; the two measurements must match. Glue and fasten 3/4-inch tongue-and-groove plywood across the joists, staggering panel ends and supporting the floor-section seam.
- Snap one centerline through both floor sections before joining.
- Keep sheet layout independent of the structural section joint.
- Recheck level from front to back after anchoring.
Wall framing
Build 20-foot walls as coordinated panels
Divide each long wall into two liftable panels, but do not let both plate joints stack at one stud line. Provide the designed end studs and fastening where panels meet, then lap the second top plate well past the joint. Lay both wall sections from one story pole so studs remain aligned with floor joists and roof framing.
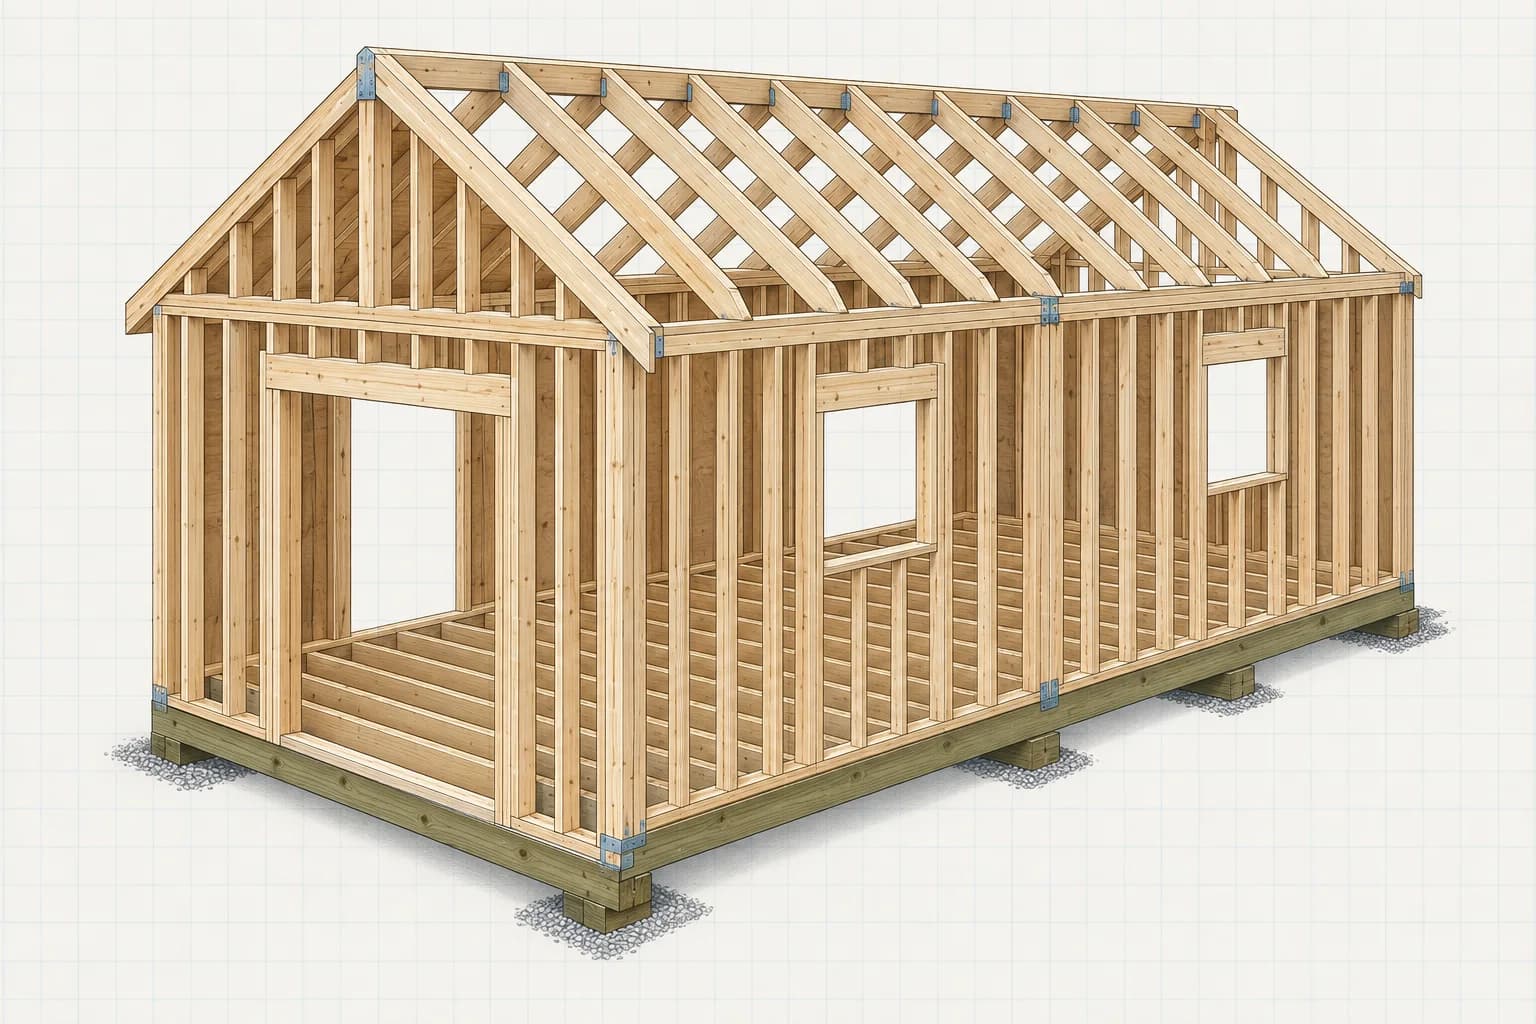
Frame window rough openings from the manufacturer’s data and size headers for the actual loads. The front wall’s six-foot double door needs full-height framing and an approved header while preserving enough braced wall beside the opening. Avoid adding an unplanned rear door that removes the wall segment intended for bracing.
Wall assembly
Raise, straighten, then lock the walls
Lift one panel at a time with wall jacks or enough people to control it. Brace each section at both ends before releasing it, connect adjoining panels, and use a line along the top plate to straighten the full 20-foot run. Add the gable walls, plumb corners, and install the overlapping top plate only after alignment is correct.
A wall can be plumb at both ends yet bow several inches through the middle. Brace the center to a string line before structural sheathing fixes that curve in place.
Roof framing
Choose site-cut rafters or delivered trusses
Site-cut opposing rafters keep the design familiar, while engineered trusses can make a 20-foot roof faster and repeatable. The two systems have different bearing, bracing, tie, and lifting requirements—select one in the approved design before ordering the wall package. Never field-modify a manufactured truss.
For conventional 5:12 rafters, build one pattern and test it at several points along both wall plates. Install paired rafters, the specified ridge and ties, rated uplift connectors, and gable outlook framing. Temporary roof bracing must remain until sheathing creates the designed diaphragm.
Weather shell
Close the roof in controlled sections
Sheath from a straight eave reference and stagger roof-panel joints. Do not load all sheets on one unbraced roof area. Install edge metal, underlayment, flashings, and the selected roofing in the manufacturer’s order, completing enough each day that wind cannot get below loose membranes.
Wall sheathing should bridge the framed panel joint according to the bracing design. Apply the weather-resistive barrier shingle-fashion, flash window sills before the units are set, and integrate jamb and head flashing. Maintain siding clearances from gravel, roofing, and horizontal trim.
Openings + fit-out
Finish two zones, not one crowded room
Hang a weather-shedding exterior door pair on heavy hinges and brace site-built leaves to resist sag. Keep the finished threshold compatible with a removable ramp. Set both windows plumb, level, square, and fully flashed; their matching sill height should leave room for a continuous bench below.
Put deep or wheeled storage near the entrance and reserve the back wall for the bench. Shallow cabinets or French cleats on the solid long wall maintain a clear aisle. Plan electrical work before lining the interior, use a licensed trade where required, and never treat an extension cord as permanent workshop wiring.
Make it site-specific
Coordinate the workshop with the property
A larger shed needs a deliberate route, foundation, drainage plan, electrical strategy, and window orientation. HomeCat keeps the site and building decisions together while you adapt the reference plan to how the property is actually used.
Customize these shed plansCommon questions
Before you start
Does a 12×20 shed need a building permit?
In many places, yes. At 240 square feet it exceeds common exemption thresholds. Confirm building and zoning permits, setbacks, lot coverage, height, foundation, structural loads, electrical work, and the proposed use with local authorities.
Can a 12×20 shed use a skid foundation?
Some sites allow a designed, anchored skid base on well-drained stone. The length, soil, frost depth, wind exposure, workshop use, and local code may instead require piers, helical piles, or a permanent foundation.
Should I use rafters or roof trusses?
Both can work. Site-cut rafters suit conventional framing when ties and spans are properly designed. Engineered trusses arrive as a coordinated system and can speed assembly, but require delivery access, safe lifting, permanent bracing, and no unapproved field cuts.
How should the inside be organized?
Keep the first 8 feet flexible for equipment and material handling. Place the primary bench under the rear windows and use shallow storage on the opposite wall so the 12-foot width retains a generous working aisle.