
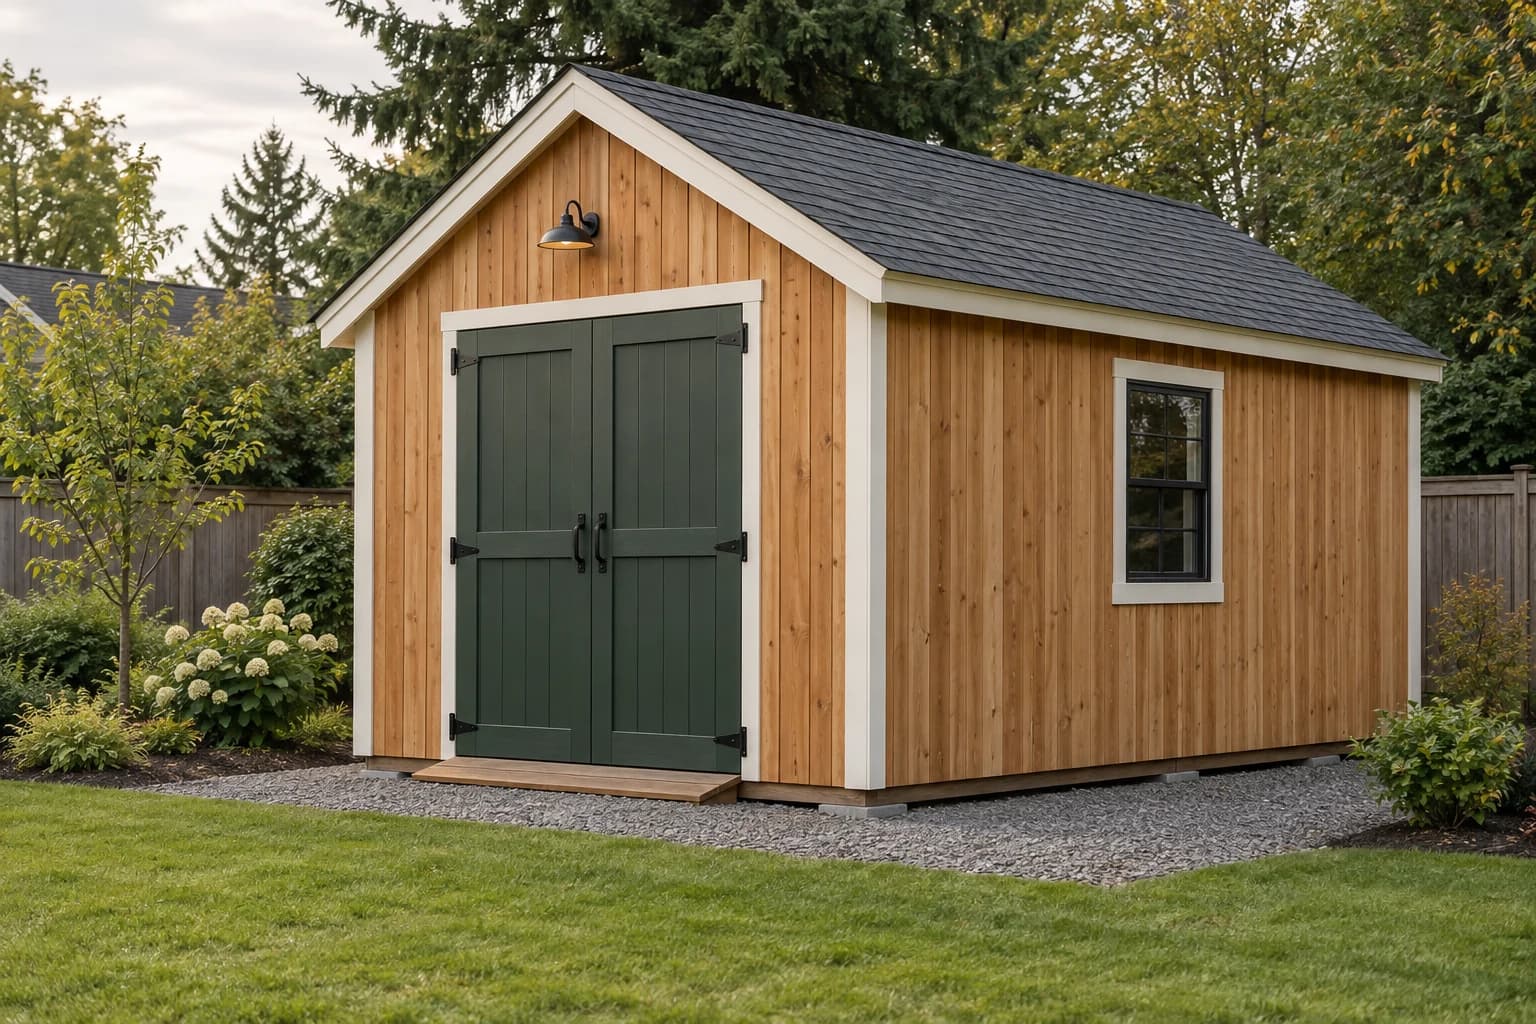
This 12×16 shed is sized for bikes, a mower, seasonal storage, and a full wall of shelving without feeling like a second garage. The simple gable form keeps the framing understandable, while the six-foot door opening makes it easy to move bulky equipment in and out.
The guide below is a construction reference, not a sealed permit set. Soil, frost, wind, snow, lumber species, and local code can change the foundation, headers, rafters, connectors, and fastening schedule. Confirm those items locally before ordering or cutting material.
Locate utilities and confirm setbacks, easements, lot coverage, height limits, and permit requirements. A 192-square-foot shed is over the exemption threshold in many jurisdictions.
A straightforward footprint with useful access
The door sits on a 12-foot gable wall, leaving both 16-foot side walls useful for shelving and tool storage. A single window brings daylight to the back half of the shed without giving up too much wall space. Three longitudinal skids spread floor loads over the gravel base and keep framing away from standing water.
Materials and tools
Use this as a budgeting takeoff, then reconcile it against your final foundation, opening, and structural details. Quantities include a modest cutting allowance but are not a substitute for a project-specific order list.
| Assembly | Main material | Planning quantity |
|---|---|---|
| Base | 4×6×16′ pressure-treated skids | 3 |
| Floor | 2×6 pressure-treated joists and bands | 15 pieces total |
| Subfloor | 3/4″ tongue-and-groove exterior plywood | 6 sheets |
| Walls | 2×4 studs, plates, cripples, and blocking | About 70 pieces |
| Roof | 2×6×8′ rafters plus approved ties and ridge | 26 rafters |
| Sheathing | 7/16″ wall and roof panels | About 27 sheets |
| Roofing | Underlayment and asphalt shingles | About 3 squares |
| Exterior | Weather barrier, flashing, siding, and trim | Allow 550 sq. ft. |
Set up for accurate layout
- Circular or miter saw
- Drill and impact driver
- Framing square and speed square
- 4-foot level and string line
- Tape, chalk line, and clamps
- Hammer or framing nailer
- Ladders and fall protection
- Eye, ear, and hand protection
Site work
Prepare a level, draining base
Mark a 14×18-foot work area so the gravel extends roughly 12 inches past the shed on every side. Remove sod and organic topsoil, install separation fabric where it helps with soft soil, then place about 4 inches of compactable crushed stone. Compact in thin lifts instead of trying to settle the full depth at once.
- Set batter boards outside the excavation and pull square reference strings.
- Keep the finished gravel slightly above grade and slope the surrounding soil away.
- Check level across the pad and drainage along both long edges before framing.
Foundation + floor
Set the skids and frame the platform
Run three pressure-treated 4×6 skids in the 16-foot direction and space them evenly beneath the floor. Bed and level each skid on the compacted stone or on locally approved bearing blocks. Keep all three in one plane so the floor frame bears without rocking.
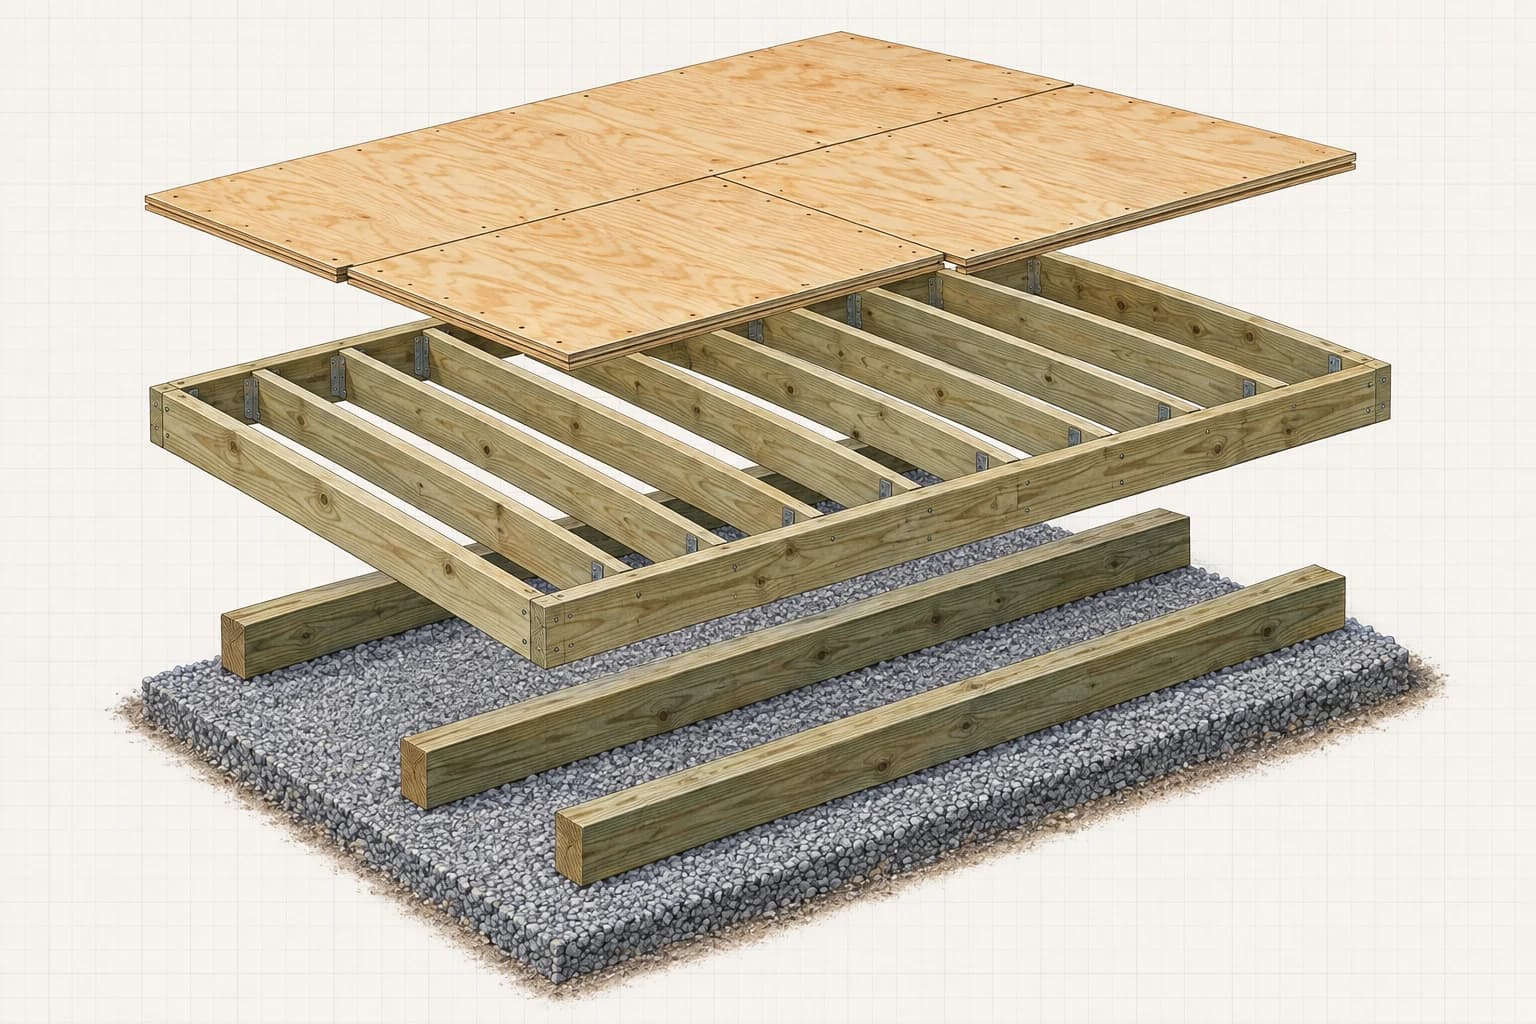
Assemble a true 12×16-foot rectangle from pressure-treated 2×6 material. Run joists across the 12-foot width at 16 inches on center, crown up. The two corner-to-corner diagonals should both read exactly 20 feet; match them before fastening the frame to the skids with approved structural connectors.
- Mark joist layout from the same end on both long bands.
- Add blocking wherever a plywood edge will not land on framing.
- Recheck level and square after anchoring to the skids.
Subfloor
Glue and fasten the floor deck
Lay 3/4-inch tongue-and-groove exterior plywood with the face grain perpendicular to the joists. Stagger end joints, keep square-cut panel edges supported, and leave the manufacturer’s recommended gap at non-tongued edges. A bead of subfloor adhesive on each joist helps prevent squeaks and stiffens the platform.
Fasten from the center of each sheet outward so it stays flat. Use the panel maker’s approved exterior nail or screw schedule, then snap wall lines directly on the clean deck. Seal fresh cuts if the floor may sit exposed to weather between work days.
Wall framing
Frame the walls flat on the deck
Build one wall at a time on the floor platform. Lay out 2×4 studs at 16 inches on center, mark both plates together, and keep crowns facing the same direction. The reference front wall has a centered 6-foot double-door opening; the side window rough opening must follow the window manufacturer’s actual unit dimensions.
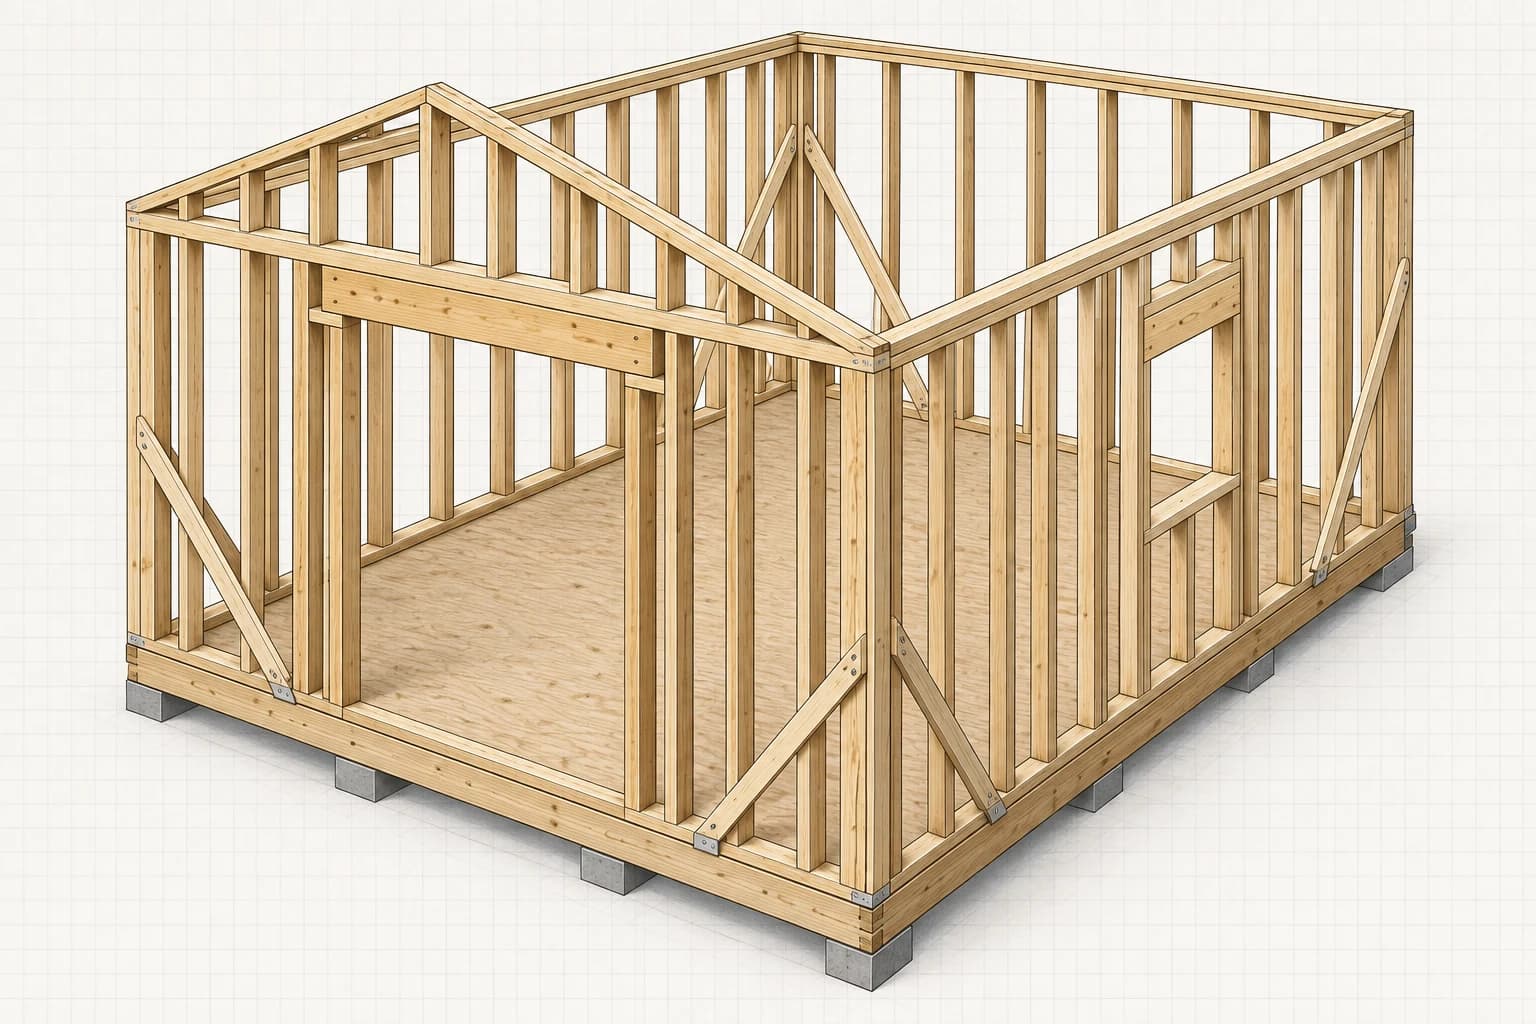
Use king studs, jack studs, and cripples around openings. Header size is load- and location-dependent—especially in snow country—so do not choose it from appearance alone. Frame gable triangles after the rectangular walls are standing, using a rafter template to establish the roof line.
Assembly
Raise, plumb, and brace the shell
Raise the two long walls with enough help to control the lift, then brace them from the top plate back to stakes or the floor. Add the gable walls, fasten adjoining corner studs, and check every wall for plumb before installing the second top plate. Lap that upper plate across corners so the four walls act together.
A floor can be square while a wall frame leans out of plane. Matching top-corner diagonals keeps roof layout predictable.
Roof framing
Cut one verified rafter, then repeat
A 5:12 pitch rises 2 feet 6 inches over the 6-foot half-span. The theoretical rafter line is about 6 feet 6 inches from outside wall to ridge before the eave overhang and ridge adjustment. Make one pattern rafter, test it on both sides of the building, and only then transfer the plumb cut and birdsmouth to the remaining stock.
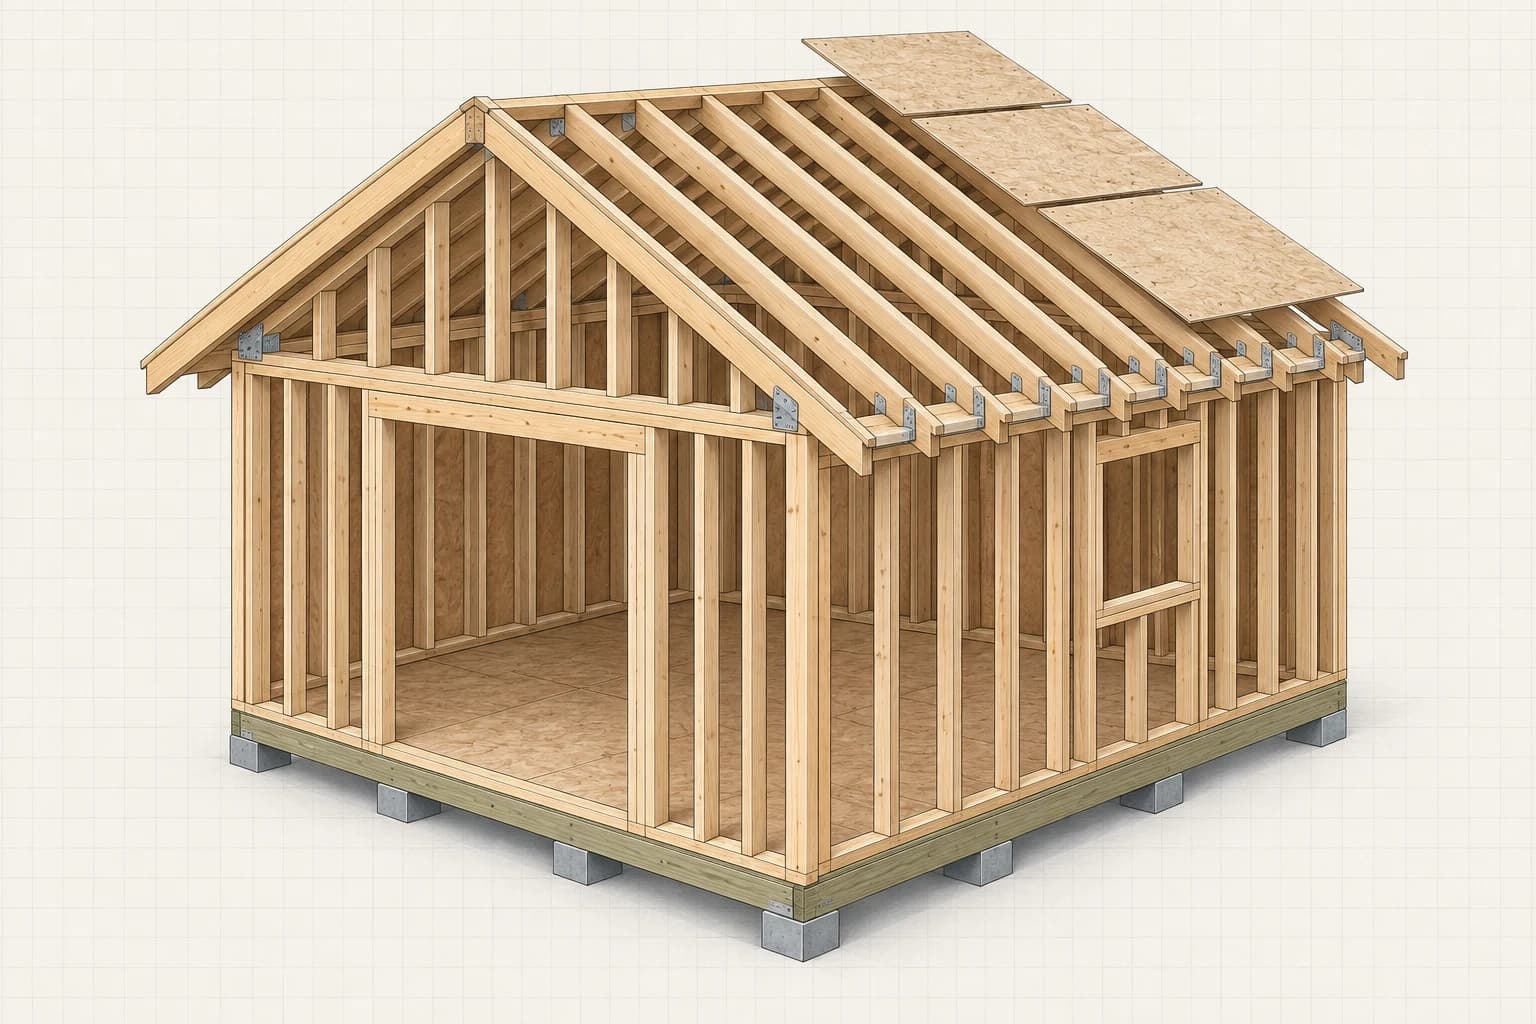
Install the ridge straight and temporarily support it at the correct height. Set opposing rafters in pairs at 16 inches on center, add code-compliant rafter or ceiling ties to control wall spread, and use rated uplift connectors at every bearing point. Do not notch the birdsmouth deeper than the allowed portion of the rafter.
Weatherproofing
Dry in the roof before finishing walls
Install roof sheathing perpendicular to rafters with staggered joints, supported panel edges, and the specified edge gaps. Add eave drip edge, underlayment, rake drip edge, starter strip, shingles, and ridge cap in the manufacturer’s sequence. Keep roof penetrations to a minimum and use a continuous ventilation path if the roof assembly calls for one.
Sheath the walls, tape or flash critical joints as required, then install the weather-resistive barrier shingle-fashion from bottom to top. Flash the window sill, jambs, and head before siding. Maintain the siding maker’s required clearance above gravel and hard surfaces so the bottom edge can dry.
Openings + finish
Hang the doors, set the window, and trim
Set the window plumb, level, square, and fully flashed. Build the two 3-foot door leaves on a flat surface or install a rated exterior double-door unit. Use three heavy hinges per leaf, a rigid head jamb, and a threshold that sheds water away from the floor edge. Leave even operating gaps and provide a positive latch at top and bottom on the inactive leaf.
Finish with corner boards, rake and fascia trim, insect-screened vents, and a durable exterior coating on every cut end and exposed face. Adjust doors after the building has had a few wet-and-dry cycles; large wood leaves often need a final hinge or latch correction.
Make it site-specific
Turn the reference shed into your shed
Change the foundation, door and window positions, exterior materials, and roof for your property, then coordinate the result with the site plan and local requirements. HomeCat keeps those decisions connected in one project instead of scattering them across sketches and notes.
Customize these shed plansCommon questions
Before you start
Does a 12×16 shed need a permit?
Often, yes. At 192 square feet, this shed exceeds many local permit exemptions. Confirm zoning, setbacks, lot coverage, height, and building-code requirements with the authority having jurisdiction before work begins.
Can a 12×16 shed sit on skids?
A skid base can suit some detached storage sheds on well-drained, compacted gravel. Frost depth, wind exposure, soil, anchorage, and local rules may instead require piers or a permanent foundation.
How long does the build take?
A prepared two-person crew should plan on roughly four to six working days for the shell. Add time for site work, paint, interior fit-out, inspections, material delays, and weather.
Can I move the door or add more windows?
Yes, but each opening changes stud layout, headers, wall bracing, siding joints, and storage space. Keep sufficient full-height framing near corners and have the revised wall checked against local structural requirements.