
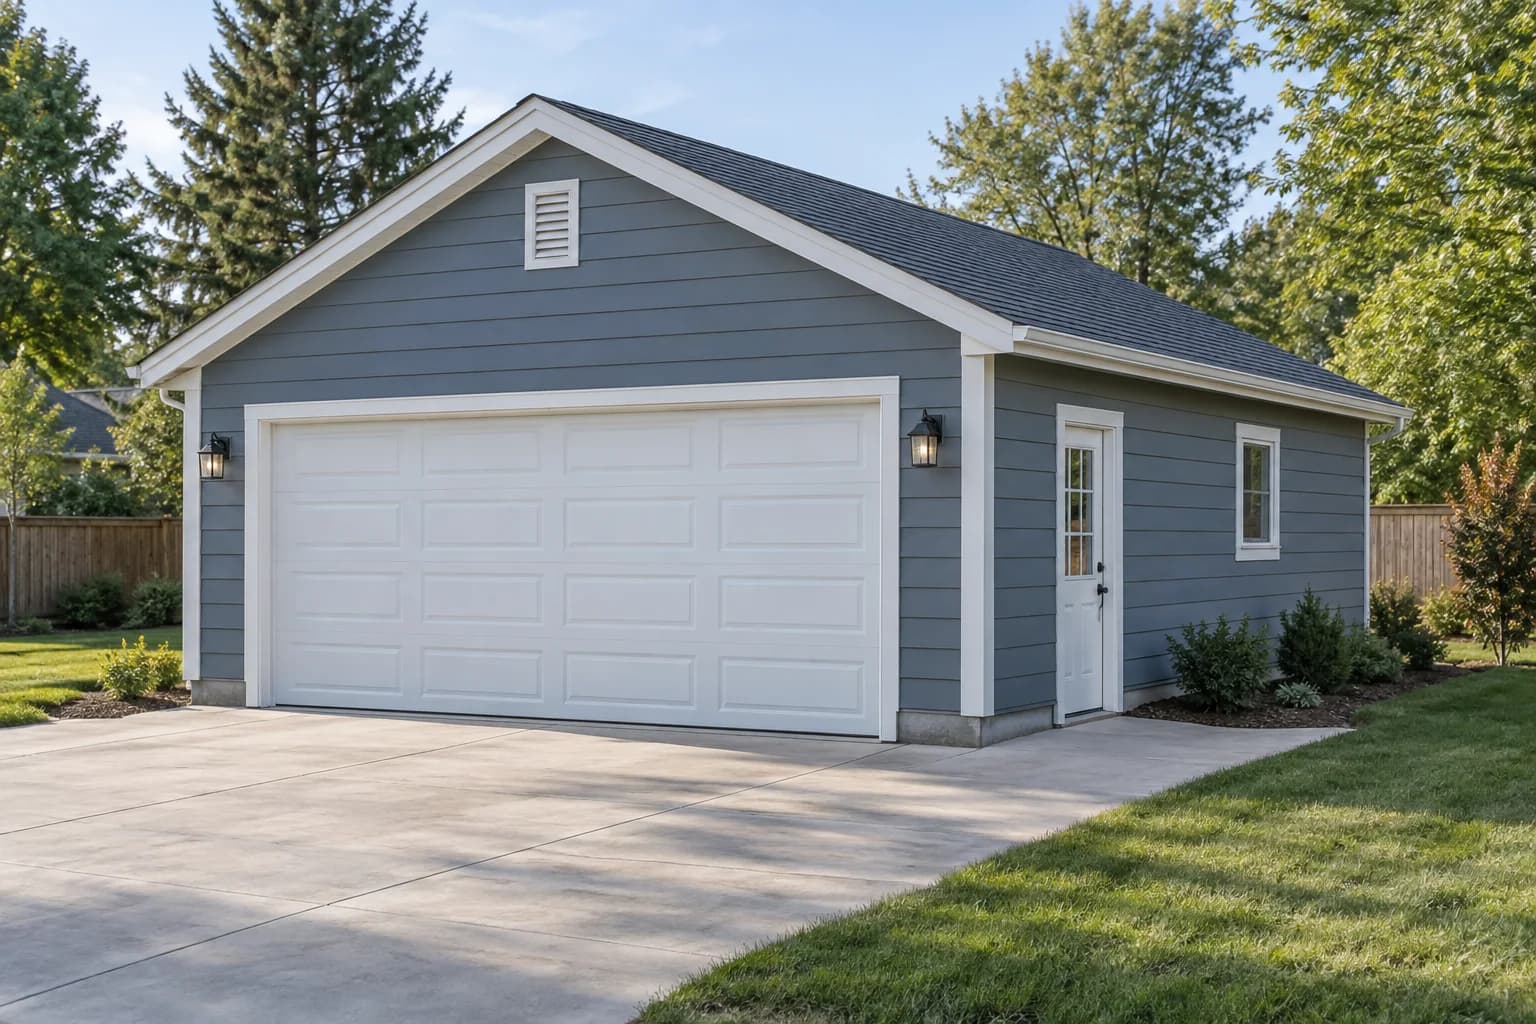
The 24×24 footprint is popular because it gives two ordinary vehicles enough breathing room without turning the garage into a large outbuilding. Compared with 20×20, those extra four feet in both directions make passenger doors, rear hatches, bicycles, and shallow shelving much easier to manage.
This page is a planning and sequencing guide, not an engineered permit set. Final details depend on survey information, soil and frost, concrete exposure, local snow and wind loads, seismic demand, fire separation, energy rules, and the selected overhead-door system.
Resolve zoning, foundation engineering, the front-wall lateral system, fire protection, electrical work, and vehicle egress before ordering the building package.
Space planning
Use the width for doors, not deep cabinets
The one-piece 16-foot door gives a generous shared approach and avoids a center pier, but it also removes most of the front wall. Reserve the first several feet inside the opening for door tracks, controls, mirrors, and turning. Put 18- to 24-inch-deep storage along one side only after confirming the remaining clear aisle with both vehicles present.
An outward-swinging service door can preserve interior floor area where climate and code allow it, but snow accumulation, landings, steps, and security need consideration. Maintain a continuous route from both parking positions to that exit and keep any electrical panels fully accessible.
Budgeting takeoff
Allowances for the reference shell
Use these ranges to test budget and delivery logistics. The approved foundation plan, structural schedules, door drawings, and selected finishes control the order.
| Assembly | Planning basis | Allowance |
|---|---|---|
| Foundation | Slab, edge, or stem-wall system | Site and engineer-specific |
| Granular base | Compacted base below slab | About 15–20 yd³ |
| Exterior walls | 2×6 studs, plates, blocking | About 140–160 pieces |
| Door header | Engineered 16-foot opening assembly | Per structural schedule |
| Wall sheathing | Structural rated panels | About 36–40 sheets |
| Roof framing | Engineered 24-foot trusses | About 13 at 24″ o.c. |
| Roof sheathing | Rated panels | About 24–27 sheets |
| Roofing | Underlayment and shingles | About 7 squares |
| Exterior finish | WRB, flashing, siding, trim | About 900 sq. ft. |
Site, concrete, and framing tools
- Survey layout and rotary laser
- Plate compactor and excavation equipment
- Rebar and forming tools
- Screed, floats, and curing supplies
- Circular and miter saws
- Framing nailer and compressor
- Truss bracing and lifting plan
- Scaffold and fall protection
Planning + layout
Place the garage, driveway, and floor together
Stake the full exterior and the driveway apron. Check vehicle turning from the street, not just the opening width. Confirm easements, property lines, setbacks, lot coverage, height, grading, utility separation, and tree constraints. Set finished floor and door-threshold elevations so surface water drains away without creating an aggressive ramp.
- Locate buried and overhead utilities before excavation.
- Reserve space for roof runoff, snow storage, and exterior maintenance.
- Show any future EV charger, heater, floor drain, or water line on the permit set.
Subgrade + forms
Prepare the locally designed foundation
Excavate to undisturbed or engineered bearing, remove soft material, and compact the base in lifts. Form the slab edge, footing, or stem walls shown on the drawings. Frost depth, expansive soil, fill history, slope, and groundwater can all change a seemingly simple slab.
Slab
Reinforce, pour, joint, and cure
Install the specified drainage layer, vapor barrier, insulation, reinforcement, dowels, thickened zones, and anchors without puncturing or displacing them. Keep reinforcement chaired at the designed height. Establish any intentional drainage slope in the forms and screeds, while keeping wall bearing surfaces and door-track locations true.
Place concrete continuously where practical, consolidate edges, finish to the required slip resistance, and cut control joints to the approved layout. Protect the slab from rapid drying, freezing, rain, and premature vehicle loads during cure.
Walls + opening
Frame the 16-foot door as an engineered assembly
Set treated plates over sill gasket, locate anchors accurately, and frame the walls to the approved spacing. The long header needs full bearing on designed post packs, and those posts need connections that continue through anchors into the foundation. Preserve the specified full-height sheathed wall segments at both front corners.
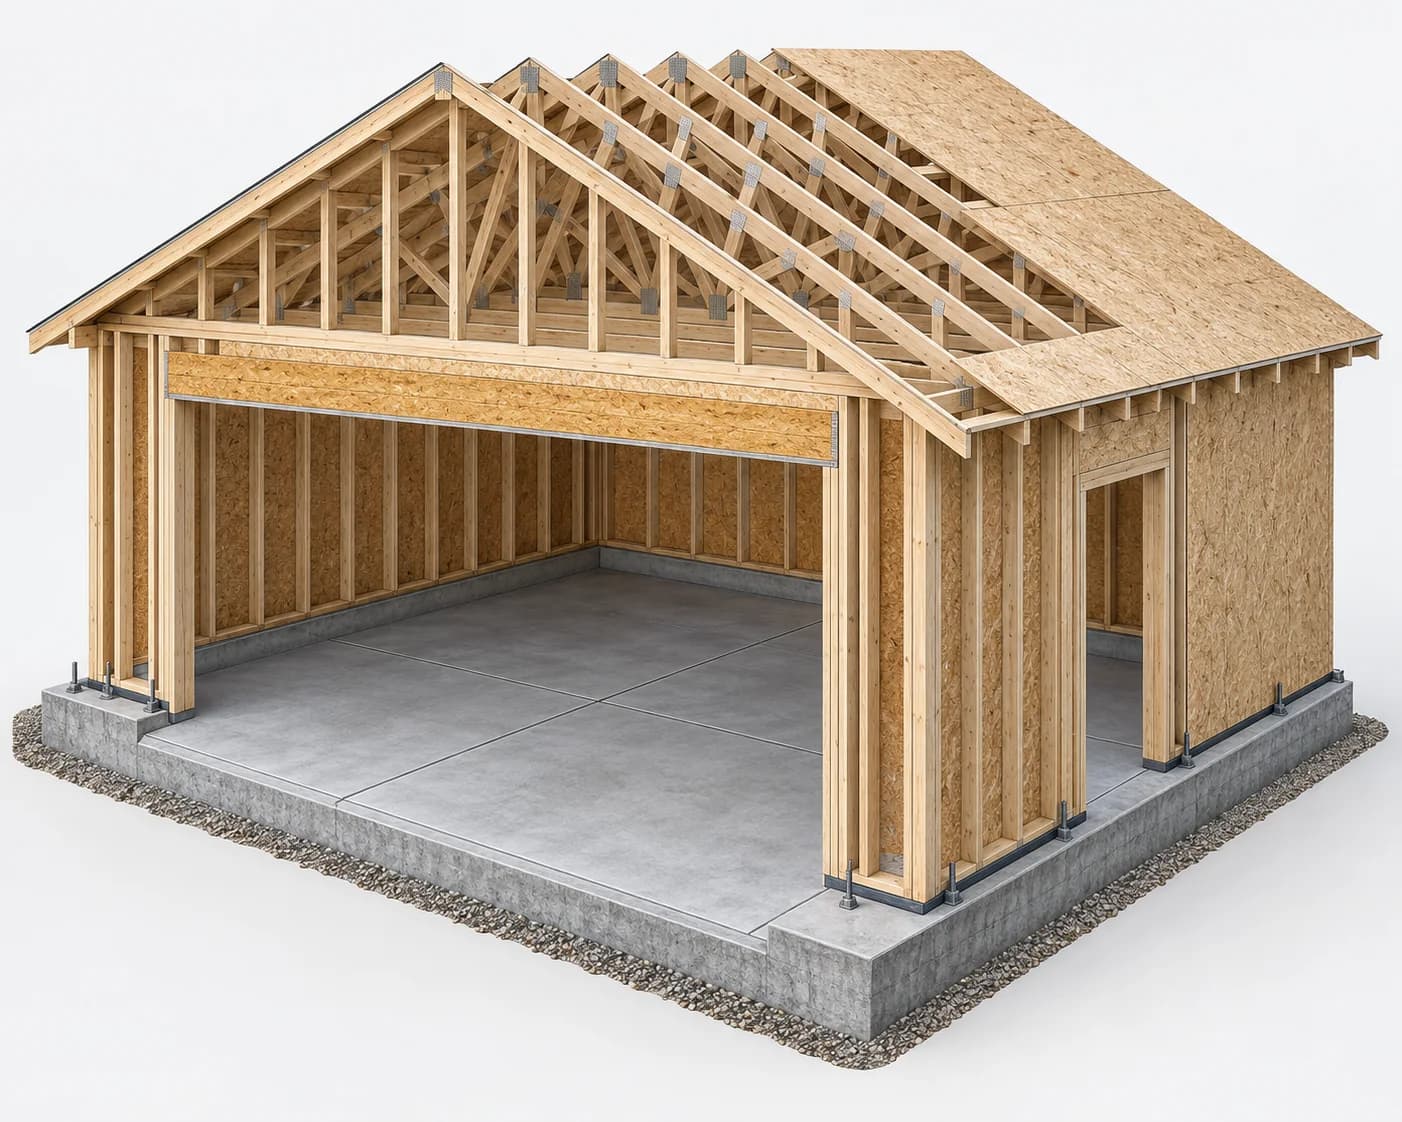
- Match the exact rough opening and headroom required by the selected door.
- Check the jambs for plumb and parallel before permanent sheathing.
- Brace every wall until the complete lateral system is fastened.
Trusses
Follow the package from unloading to bracing
Store trusses upright and supported, compare every mark to the placement plan, and prepare safe lifting and bracing before the first set. Install each truss at its bearing points with the specified connectors. Complete all permanent lateral, diagonal, and web bracing before relying on the roof deck for stability. Do not alter chords or webs to clear an opener, attic ladder, or duct.
Envelope
Close the roof first, then integrate every opening
Lay roof sheathing perpendicular to trusses with specified gaps, clips or blocking, and fastening. Complete drip edges, underlayment, shingles, flashing, and ventilation as one tested roof system. Sheathe and wrap walls, then flash the service door and window from sill to head so each upper layer laps the one below.
Door + services
Commission the building, not just the opener
Install the overhead-door jamb seals, tracks, springs, panels, and opener to the listed instructions. Confirm balance, manual release, photo-eye location, force reversal, locking, weather seals, and clear travel. Keep controls and the pedestrian exit reachable from both parking bays.
Complete inspected wiring, lighting, EV charging, ventilation, and heating with qualified trades. Protect any separation required near a house or lot line, and never create an unsealed opening into living space. Provide carbon-monoxide alarms wherever local rules require them and never warm up a vehicle indoors.
Make it property-specific
Coordinate the garage with the site
Choose the opening arrangement, foundation, roof, exterior finish, and services in one model, then carry those decisions into the site and permit drawings.
Customize these garage plansCommon questions
Before you build 24×24
Is 24×24 a good two-car garage size?
For many midsize vehicles, yes. It allows much better door swing and circulation than 20×20, plus shallow storage. Measure full-size trucks, roof boxes, hitches, and rear hatches before finalizing.
Should I use one double door or two single doors?
A double door gives a flexible shared opening; separate doors can make alignment easier and retain a center pier. The two schemes need different headers, posts, bracing, and exterior proportions, so decide before engineering.
Can I add a floor drain?
Only when local plumbing and environmental rules allow it. Some jurisdictions prohibit garage drains or require an approved connection, trap primer, oil interceptor, or other treatment. Never discharge vehicle fluids to soil or stormwater.
Can I heat and insulate the garage later?
Yes if planned carefully, but underslab insulation, vapor control, service capacity, combustion-air requirements, ventilation, and wall/roof assemblies are much easier to coordinate before the slab and framing are complete.