
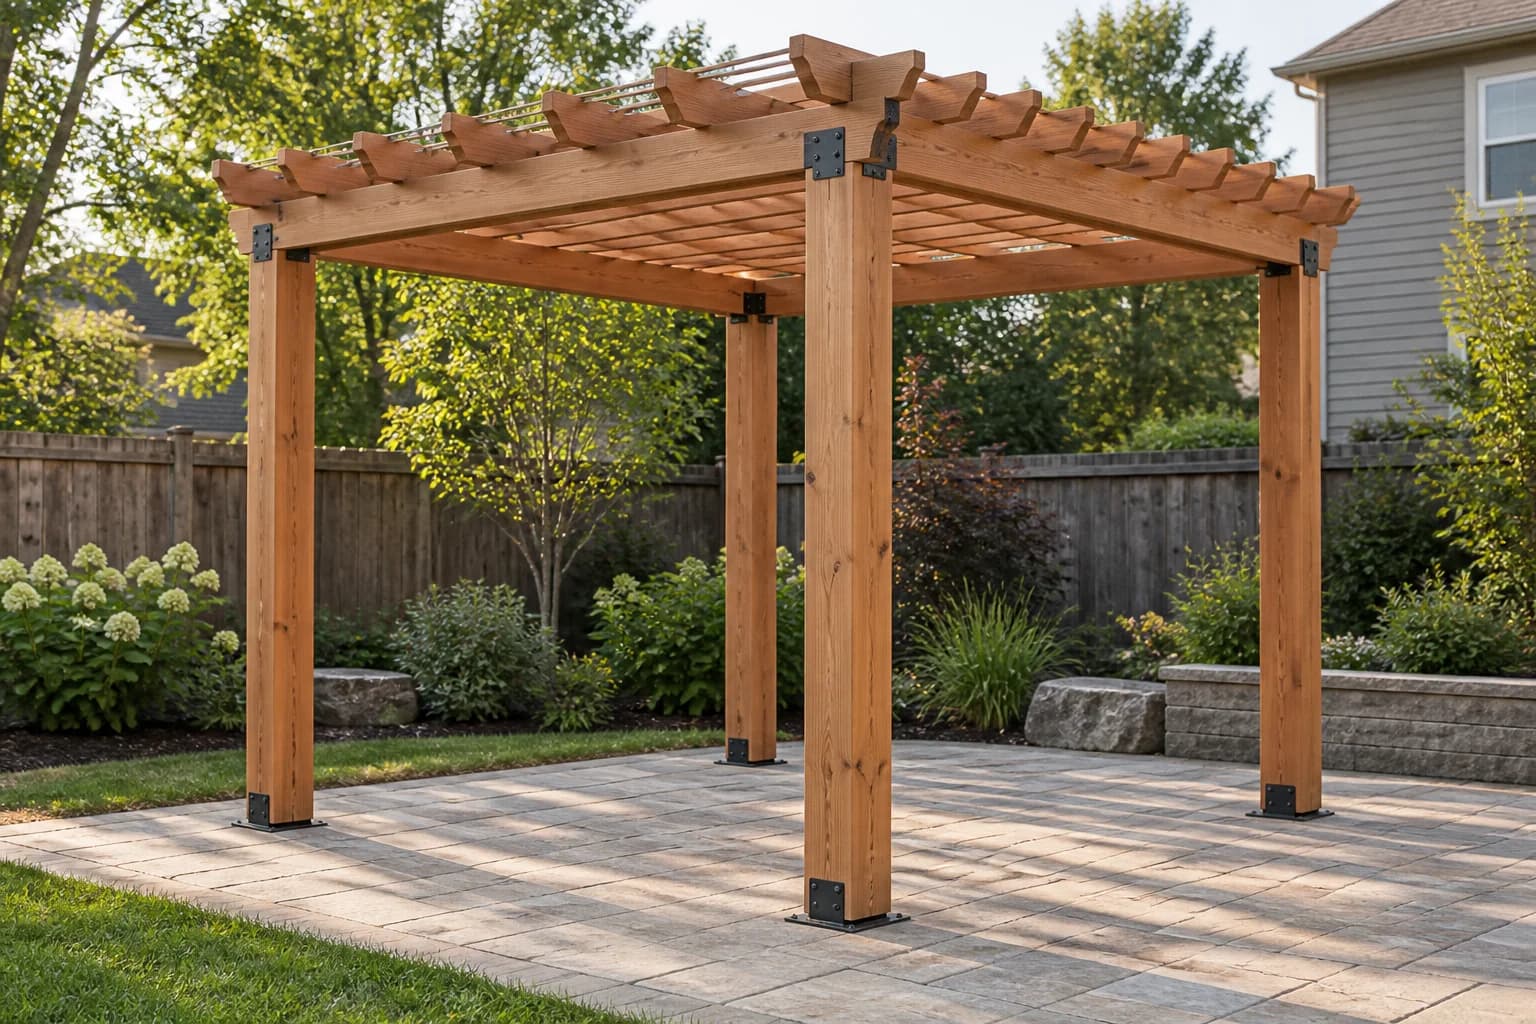
A 10×10 pergola is large enough to define a four-seat conversation area or compact outdoor dining zone, but small enough to fit many urban backyards. Keeping it freestanding avoids a house ledger and the flashing problems that come with one.
These plans describe a load path and build sequence, not a sealed structural set. Frost, soil, wind, lumber species, treatment, span limits, and local rules can all change the pier, beam, rafter, connector, and bracing details.
Locate utilities, then confirm setbacks, easements, height, lot coverage, and permit rules. A pergola may be considered a structure even though its roof is open.
A square plan that stays comfortably open
The reference roof finishes at 10×10 feet, while the post centres form a 9×9-foot square. That modest overhang protects the beam ends visually without turning the rafters into long cantilevers. Paired beams run along two opposite sides; rafters cross them, and small purlins run above the rafters to create shade.
Materials and tools
Treat this list as an early takeoff. Reconcile it with the approved pier size, actual lumber grades, connector manufacturer, and any local structural review before ordering.
| Assembly | Main material | Planning quantity |
|---|---|---|
| Footings | Concrete piers and compacted stone bases | 4, sized locally |
| Posts | 6×6 ground-contact-rated posts | 4 at 10′ |
| Beams | 2×10 exterior-rated beam members | 4 at 10′ |
| Rafters | 2×8 exterior-rated rafters | 7 at 10′ |
| Shade | 2×2 purlins | 11 at 10′ |
| Bracing | 2×6 knee-brace stock | 8 pieces from 4 boards |
| Hardware | Standoff bases, through-bolts, rafter ties, structural screws | One complete rated set |
Layout matters more than speed
- Post-hole digger or power auger
- Circular or miter saw
- Drill and impact driver
- Long level or laser level
- Tape, framing square, and string
- Clamps and temporary bracing
- Socket set and torque wrench
- Ladders and fall protection
Site + layout
Set a square nine-foot post grid
Establish the finished patio elevation first. Set batter boards outside the work area, pull two parallel beam lines nine feet apart, and mark the four post centres nine feet apart along those lines. Compare both diagonals; they must match before excavation begins.
- Keep post bases clear of low spots where irrigation or rain collects.
- Confirm the 10-foot roof envelope will clear fences, eaves, and property lines.
- Preserve string intersections so the centres can be recovered after digging.
Foundation
Place four piers below local frost depth
Excavate undisturbed soil at each centre and form the pier diameter specified for the soil and wind exposure. In a freezing climate, the bearing surface normally extends below the prescribed frost line. Loose fill at the bottom is not a bearing surface; remove it or compact an approved granular base.
Keep concrete above surrounding grade and use galvanized standoff bases so post ends do not sit in water. Wet-set anchors must land on the string intersections and align with the beam direction. Post-installed anchors need the concrete strength, edge distance, and embedment specified by their manufacturer.
Posts
Plumb and brace before cutting height
Set all four 6×6 posts in their standoff bases, orient their best faces toward the occupied area, and brace in two directions. Establish one level beam line around the structure. Cutting posts only after every base is fixed lets you absorb small differences in pier elevation without a sloping roof frame.
- Keep the 9×9-foot centre grid after bracing.
- Check plumb on two adjacent faces of each post.
- Seal every field-cut post end before assembly.
Primary frame
Clamp and bolt the paired beams
Run a beam along each side of the two post rows so every post is captured between paired members. Clamp the beams at the shared level line, check their end overhangs, then drill straight through the complete assembly. Use washers and the bolt diameter and spacing required by the approved connection detail.
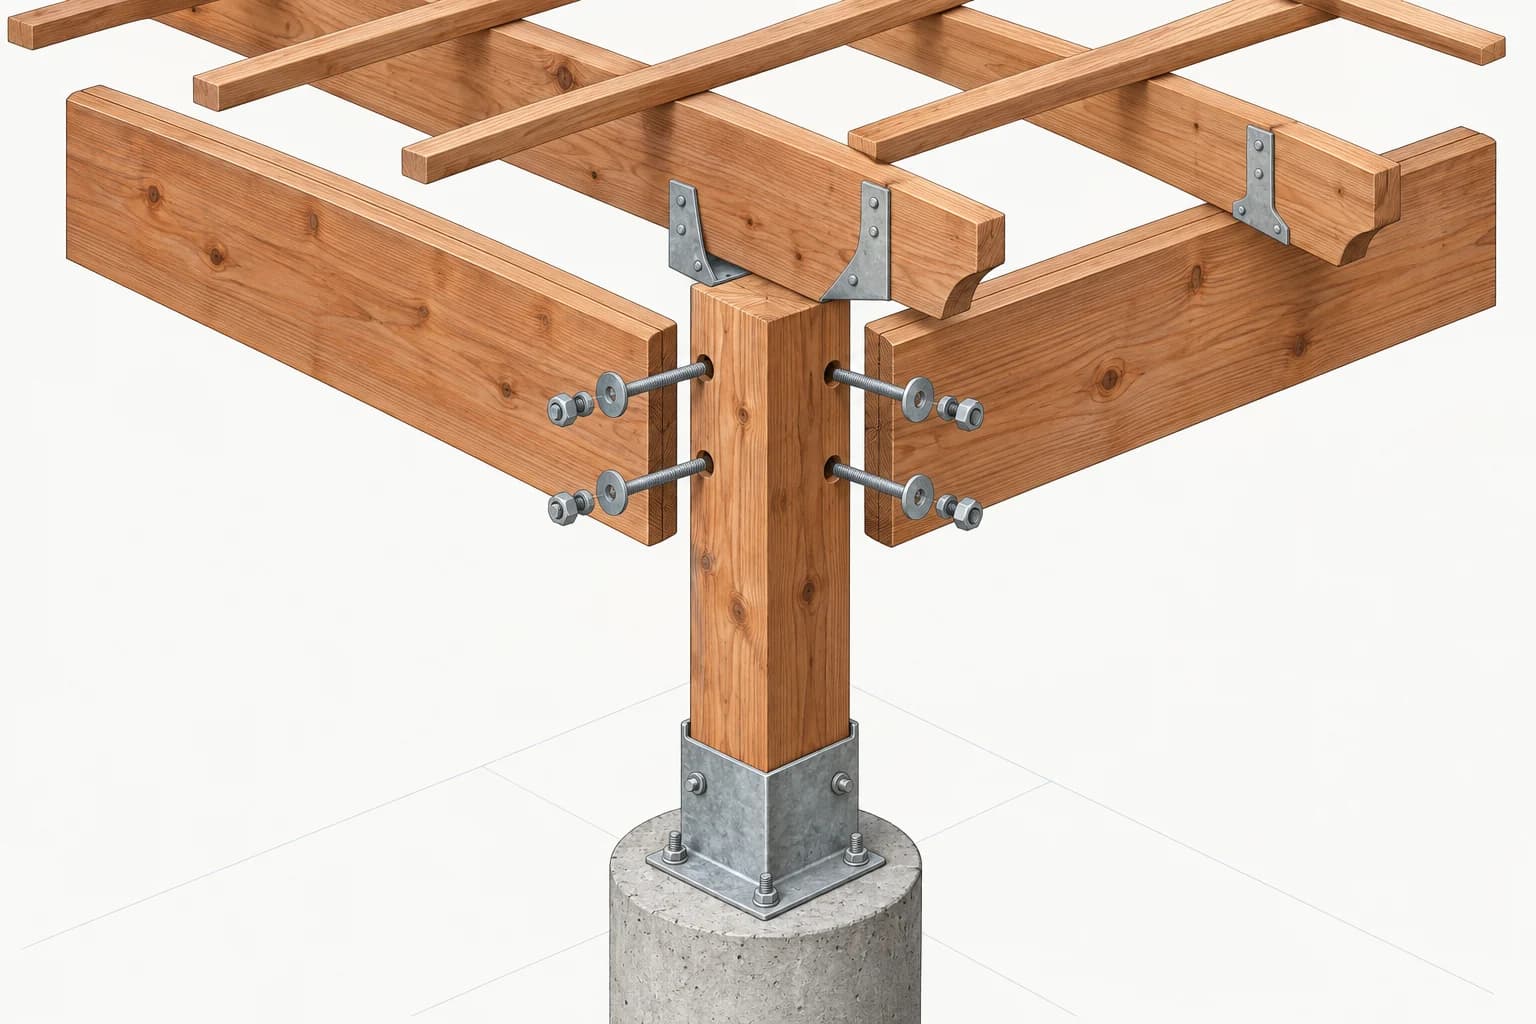
Fit 2×6 diagonal knee braces at post-to-beam corners after the frame is square. Decorative braces should not be assumed to resist code wind loads; their size, angle, and fasteners need to work as an actual structural connection.
Rafters
Space seven rafters across the beams
Cut one 2×8 rafter to the full 10-foot roof length and use it as the pattern for the other six. Space the set evenly over the 10-foot beam direction, holding equal end margins. Shallow decorative end profiles are fine, but deep scroll cuts remove useful wood where rafters are already cantilevered.
Toenails alone are difficult to inspect and may not provide the required uplift resistance. Choose exterior connectors compatible with the lumber treatment.
Shade + privacy
Tune the top layer for the sun
Run eleven 2×2 purlins perpendicular to the rafters for an open, balanced shade pattern. Before fastening, lay three or four loose pieces overhead at midday and observe the shadow. Rotating purlins or tightening their spacing increases shade, but also increases wind area and the number of fasteners.
For privacy, keep a slatted panel light and visually open. Mount it between posts on separate rails so it does not interfere with post bases or pretend to replace structural knee bracing. Confirm fence-like screens are allowed at the proposed height near the property line.
Finish
Protect cuts and schedule a hardware check
Ease sharp edges, sand handling marks, treat field cuts as required by the lumber supplier, and apply a penetrating exterior finish to dry wood. Do not seal around the bottom of a standoff base; water needs a route out. After one season of wetting and drying, inspect splits, recheck bolts, and replace any corroding fastener.
Make it site-specific
Place the pergola around your real constraints
Adjust the post grid, pier design, clearances, shade direction, and privacy side for your yard, then coordinate the result with property boundaries and local rules. HomeCat keeps the structure and site plan connected in the same project.
Customize these pergola plansCommon questions
Before you start
Does a 10×10 pergola need a permit?
It may. Rules often depend on area, height, setbacks, attachment, and whether the top remains open. Confirm zoning and building requirements before excavation.
How deep should the footings be?
Depth and diameter depend on local frost depth, soil, wind, and code. In freezing climates the bearing surface generally extends below the prescribed frost line.
Can I attach one side to the house?
Not with this detail. A house ledger changes flashing, loads, structure, and permits. This plan is deliberately ledger-free and supported by four piers.
Can I add a solid or retractable roof?
Only after redesign. A solid cover changes gravity, snow, rain, and wind loads and may turn the pergola into a patio cover under local rules.