
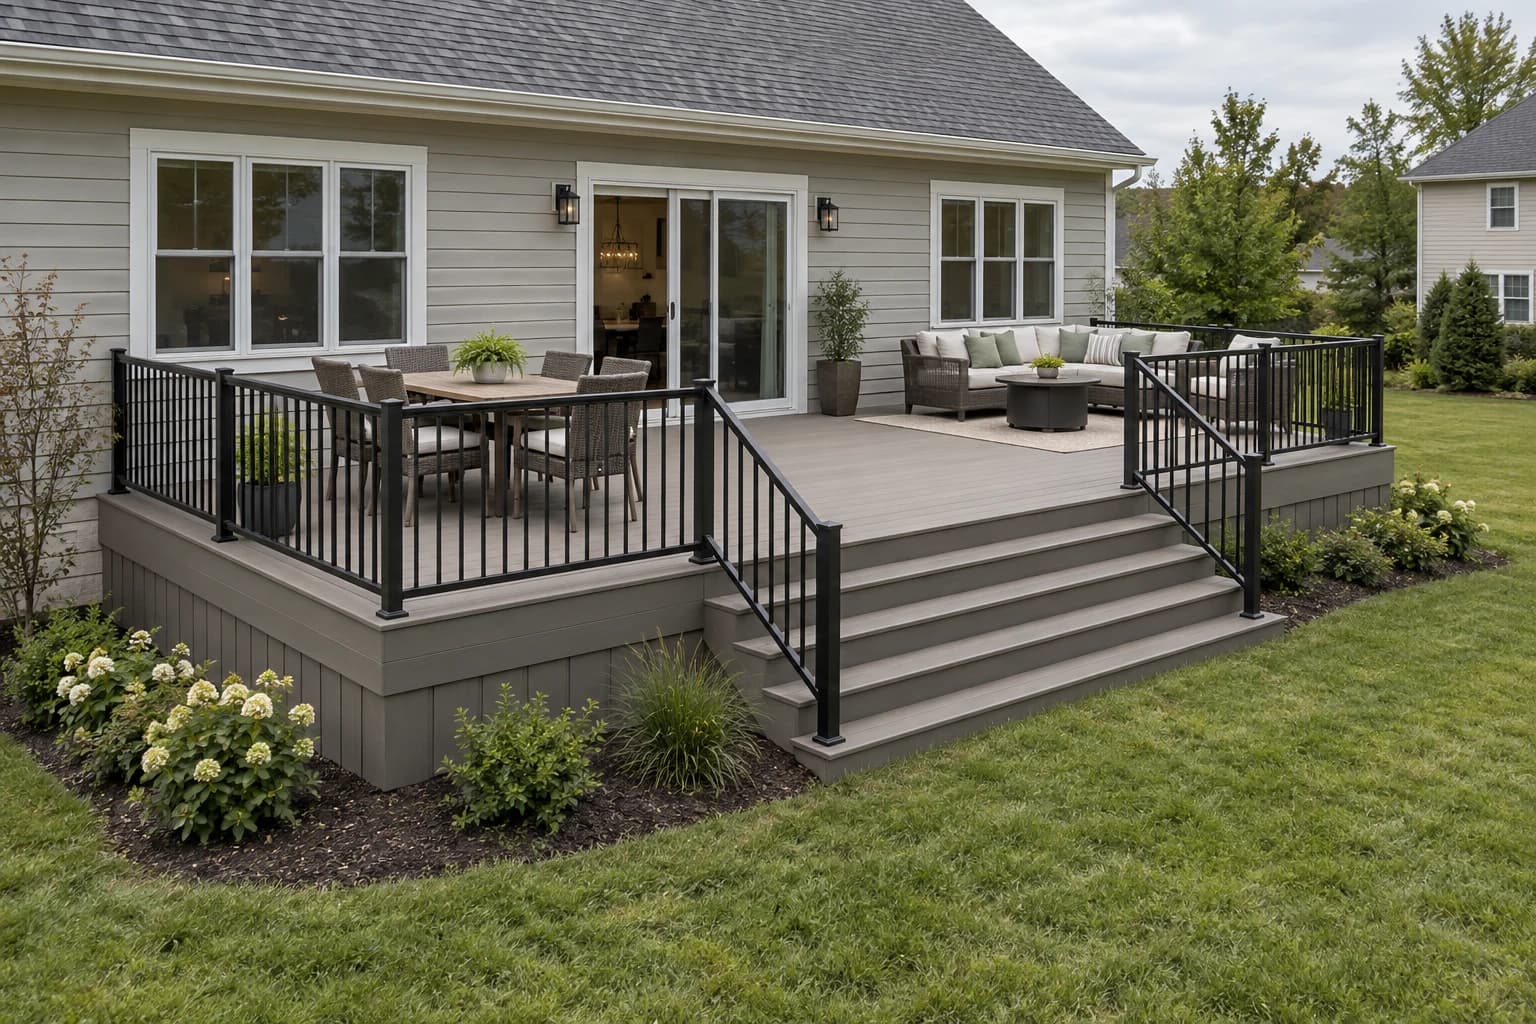
A 12×20 deck works best as a long sequence, not one oversized furniture cluster. Keep the grill near the kitchen, place dining in the middle, and reserve one end for lounge seating or an uncluttered stair approach.
The 20-foot ledger, long beam, and larger guard perimeter make accuracy and structural review more important. Confirm house framing, loads, footings, beam splices, joist spans, connectors, and stairs locally.
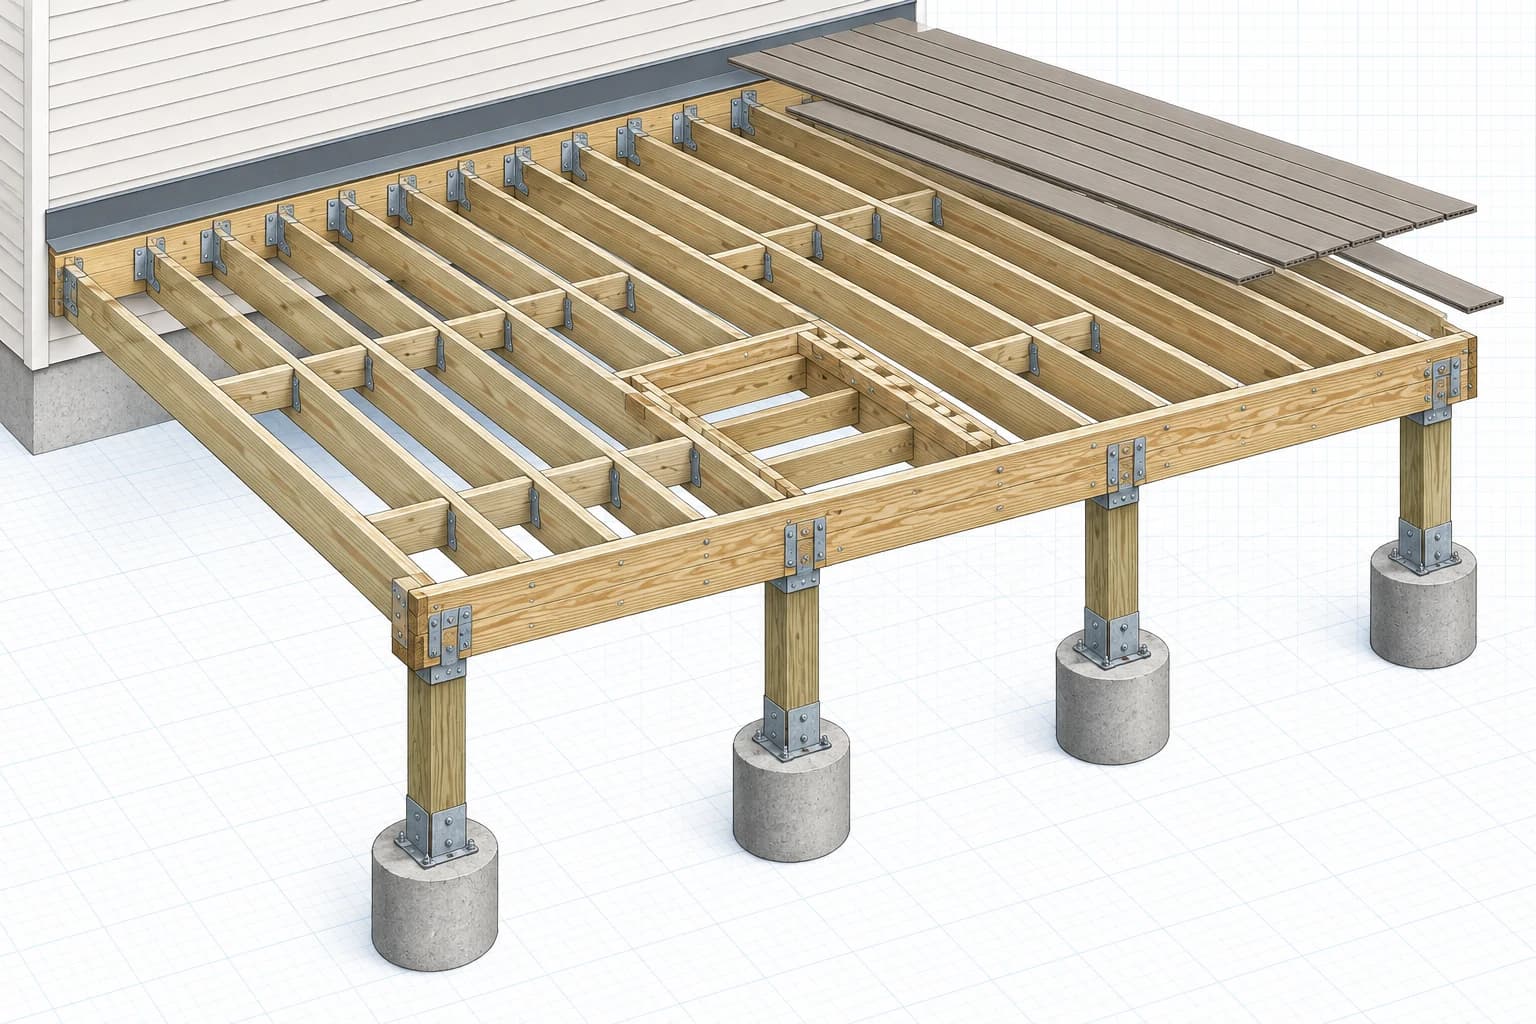
A long built-up beam commonly uses multiple stock lengths. Splices and ply joints need the bearing and fastening pattern shown by the approved design.
Use the long edge to create three practical zones
Set the 20-foot edge at the house and keep the projection at 12 feet. Align the stair with the dominant route through the yard and avoid placing it directly in front of a dining chair or outward-swinging door.
Budget for the longer beam and perimeter
Deck area alone does not tell the whole story. The 20-foot front edge adds guard, fascia, blocking, beam work, and opportunities for board waste.
| Assembly | Main material | Allowance |
|---|---|---|
| Footings | Concrete piers and anchors | 5 |
| Beam | Built-up pressure-treated beam | 20 linear ft. |
| Floor | 2×10 joists, ledger, rim, blocking | About 20 pieces |
| Decking | 5/4 boards plus waste | About 275 sq. ft. |
| Guard + stair | Posts, rails, balusters, stringers | Field measure |
Planning
Survey the full 20-foot wall
Trace utilities, vents, outlets, hose bibs, windows, and door thresholds across the ledger zone. Confirm permits and setbacks, then arrange the deck in zones before choosing stair and guard openings.
Foundation
Build an accurate five-point support line
Hold the beam parallel to the house with offset strings and center each pier under its designed bearing. Excavate below frost depth, verify soil, and recheck anchor locations before concrete cures.
Ledger
Flash the long wall in manageable sections
Integrate every flashing lap shingle-fashion, protect ledger ends, and keep required clearance from openings. Use approved structural fasteners into known framing and install lateral ties where specified.
Beam
Support and splice the built-up beam correctly
Plumb five posts, transfer elevations, and brace the line. Locate beam and ply splices only where the design allows, provide full bearing over posts, and keep the completed beam straight.
Framing
Work from fixed outside joists toward the middle
Set the ends square to the ledger, install the rim, and use a string to control the 20-foot edge. Fill joists at layout marks and add blocking for beam restraint, guards, stairs, and decking seams.
Decking
Break up long visual lines carefully
Use full-width control lines and verify board gaps at several points. Any breaker board or picture-frame border needs dedicated support and must be included before decking begins.
Completion
Connect stairs and guards to solid framing
Build stair headers and guard posts as structural connections, not trim. Finish uniform steps, rails, balusters, fascia, and drainage grading, then arrange the final inspection before loading the deck with furniture.
Take it further
Coordinate a long deck with the entire rear elevation
Model every opening, utility, furniture zone, footing, and grade transition so the deck belongs to the house instead of covering conflicts.
Customize in HomeCat12×20 deck planning notes
Can I reduce the number of posts?
Possibly with a larger or engineered beam and adequate footings. Do not remove supports without recalculating beam span and reactions.
Should decking run parallel to the house?
Most standard boards run perpendicular to joists, which means parallel to the house in this framing concept. Other patterns require revised blocking.
Can there be two stairs?
Yes, but each opening adds headers, guards, landings, and circulation space. Plan both before framing and include them in permit drawings.